I’ve developed a simple process that you can use to help make information stick and stay in your brain for a long time.
This process has helped me to achieve degrees in law and psychology and a PhD. I’m now using it to learn the science of cooking in an online course. I use it to learn all my presentations.
This process is easy but it does require doing more than simply reading your books and highlighting a bit of information. It takes a bit of work but I can assure you, it’s well worth the effort.

Before I start reading or watching a video lecture, I eliminate any potential distractions in my environment. I create a focus force field.
We know from research that distraction is the enemy when it comes to learning. If I am switching from my textbooks to a random YouTube video and then back to my books, very little information is going to stick. It’s going to take me twice as long to study.
So to save time, I put on a pair of noise blocking earmuffs, clear away any visual clutter and close my door. I also activate an Internet Blocker application (Freedom) so I’m not tempted to check social media when things get difficult or uncomfortable. You can read more about how to create an effective focus force field here.

I grab all the equipment I need for the learning task. If I’m watching a lecture, I need a pad of paper, a pen, post-it notes, headphones and a glass of water. Once I’ve got everything I need, I let the note-taking process begin! I start taking notes by hand, pausing the video lecture whenever I need to.
Why don’t I take notes on my laptop?
Because research shows you remember more when you take notes by hand.
My notes are usually messy but it doesn’t matter. These notes will soon be tossed in the bin. Here’s why …
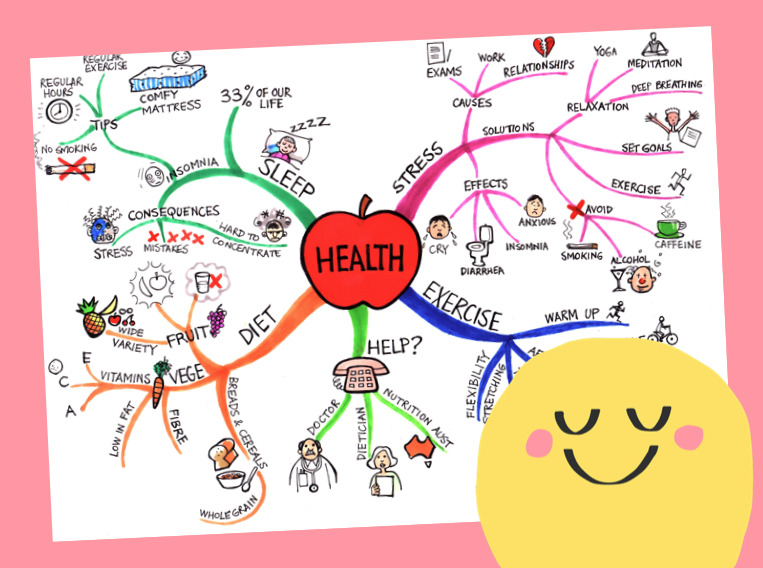
After a few days have passed, I take my messy notes and transform them into a mind map or set of mind maps. For this task, I need A3 paper, coloured pens and noise blocking earmuffs.
Through mind mapping, jumbled thoughts and ideas become organised in my mind.
Key parts of the mind mapping process include:
If I’m feeling tired and come across a topic that I don’t feel like mind mapping, I never force it.
Here’s a tip: when it comes to mind mapping you need to keep moving. If you feel bogged down by a certain idea, leave it and make a note to come back to it later.
Or simply take a break. Have a healthy snack, a glass of water and get some fresh air. Mind mapping can be tiring. You need to pace yourself.
You also want to avoid getting stuck in a perfectionist loop. Mind mapping isn’t about creating a work of art. A bad drawing is better than no drawing if it helps you understand and retain information. I remind myself of this simple fact every time I sit down to mind map.

Once I’ve finished my mind maps, I leave them for 24 hours. The information simmers away in my mind but I know some of it will start to evaporate/leak out as time passes.
This is why it’s critical that I go back and review my mind maps. I make myself a warm drink, find a comfy chair and grab a pencil, highlighter or crayon. As I review the information, I circle key ideas that are important to remember. I then go and do something else for a few hours.
A few hours later, I take the ideas I’ve circled on the mind maps and transfer them onto palm cards. I write a simple question on one side relating to a key bit of information and I write the answer on the back. I like to draw absurd pictures wherever possible to illustrate the information as it helps me to retain it.
A few days later, I take out my flash cards and practise going through them. I read the question and before I flip it over to read the answer, I force myself to get the information out of my brain. This is retrieval practice.
I’ll admit, this isn’t always easy to do and it can hurt your brain. But it’s a good kind of pain. I know I’m fast tracking the learning process by doing retrieval practice.
If I get bored of going through my flash cards, I try a different retrieval strategy.
Here are some different retrieval practice strategies I like to use:
When I get to the point where I’ve exhausted my memory with the retrieval strategy, I stop. I make sure I look at the original mind map and/or my flash cards to identify what I got right and what I still don’t know very well. Then …

What happens when I can’t retrieve anything? Or I identify a gap in my knowledge after doing retrieval practice? I go back to my mind maps and review those crazy images and the information. If the mind maps weren’t particularly good in the first place (e.g. they lack key bits of information), I’ll go back to my books and add some extra content to the mind maps or I’ll create some new flash cards.
Sometimes I’ll create a big overarching mind map (pulling together dozens of mind maps) to further consolidate the information. This is what I used to do before every law exam. Once I’d finished creating dozens of mind maps, I’d create one jumbo A3 mind map that pulled together all the different concepts. This would often lead to ‘Aha!’ moments and a deeper understanding of the content.

Retrieval practice can’t be a one off event. I tell myself I need to keep at it. For best results, I know that I need to space out my practice. Doing retrieval practice in one big chunk right before the test is a recipe for failure or at best, average results.
Being organised and a bit of planning is key to effective retrieval practice. I plan times in my week (10-15 minute slots) to review certain topics.
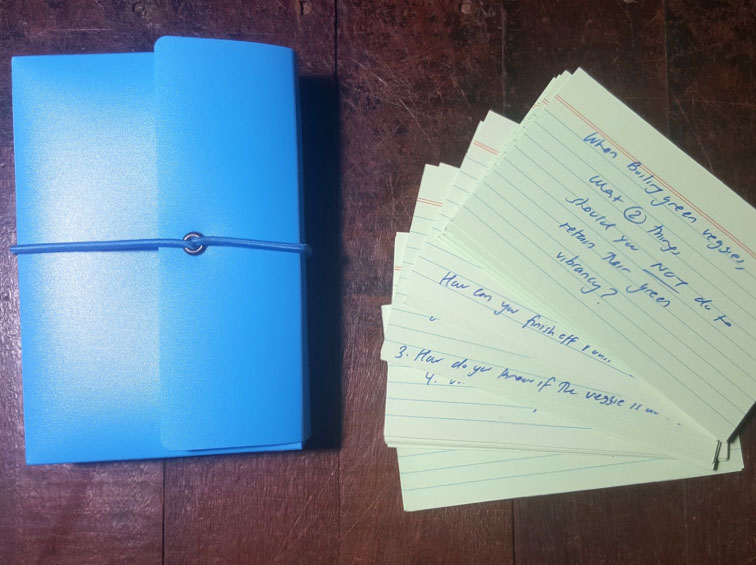
I have a box that I fill with my flash cards on different topics (labeled in alphabetical order). When I look at my calendar and see it’s time practice retrieving information on a certain topic, I simply grab the cards on that topic and go!
The beauty of flash cards is they are small and portable. Whenever I have a spare 2-5 minutes, I can get some practice in!

I realise this sounds like a lot of work. Following this process properly requires an investment in time, a bit of planning and persistence. But once it becomes a habit, you’ll find it’s easy to execute.
Yes, it takes more work than simply reading your textbooks and highlighting huge amounts of information. But it’s a more satisfying and rewarding way to learn. Why? Because the information will stay with you for a long time. You won’t simply remember it for the test and forget it afterwards.

Before adopting any new technology, the Amish will carefully consider how the device or app could impact their values, community, and way of life.
In these times of rapid change, I believe this is a valuable practice for all of us.
I recently received an email from a company that had developed an AI mind-mapping tool.
The email included a special offer. If I blogged about this AI mind mapping tool, I’d receive a year’s free pro-subscription.
Look, I love free stuff. When I see the word ‘free’, something funny happens in my brain.
I come from a thrifty family who hate waste and excessive consumption. For as long as I can remember, we’ve always received free items from others. Old bikes, broken laptops, and fridges (you name it!): we’d take the stuff, fix it, and use it.
As a family friend used to joke, “If it’s too good to throw away, give it to the Genoveses!”
But as I looked at this offer of a free subscription to mind mapping software, the usual rush of dopamine I’d get when I saw the word ‘FREE’ just wasn’t happening.
I felt nervous and uneasy.
I took a closer look at the website. At first glance, the tool looked quite impressive. You could import text, PDFs, images, and books into it, and the tool would automatically generate a mind map for you within seconds.
The website claimed this was a tool “Empowering 100,000+ thinkers”. It said it could save me time. I could generate and seamlessly edit mind maps. All of this sounded good in theory.
So, why was I having such a strong negative reaction to this new AI tool?
I recently finished reading a book called The Extinction of Experience: Reclaiming Our Humanity in a Digital World.

In this book, author Christine Rosen argues that we are facing a human crisis caused by Big Tech. The widespread adoption of technologies, such as social media, dating apps, and smartphones, has fundamentally altered the human experience — and not for the better.
Interacting with screens all day long and living in virtual worlds that reward us for sharing our most private thoughts has diminished the human experience and left us feeling disconnected.
Rosen argues we run the risk of developing habits of mind and machine-like behaviours that lead us towards an impoverished experience of the world.
In one part of her book, Rosen discusses the decline of skills like handwriting. She states:
“Like species decline, skills decline gradually.”
This sentence made me stop in my tracks. It stood out to me. Why? Because I have felt some of my skills declining in recent years.
So, when I checked out this AI mind mapping tool, I put my Amish cap on and asked myself the following questions:

If I were new to the practice of mind mapping and had only just discovered mind mapping software, things might have been different. I would have had no awareness of what I was missing out on.
But I have been mind mapping by hand, with pen and paper, for over 20 years. I don’t use any fancy apps or software (I never have).
This has been a deliberate choice on my part to preserve and sustain a practice that helps me understand and learn new information in a highly effective way.
I worry that switching from pen and paper to keyboard, mouse, and computer will cause something fundamental to change (and be lost) about my current mind mapping experience and practice.
Before adopting any app or device, you need to get clear on what job you are hiring this piece of technology to do. I use mind mapping to learn and clarify my thinking. Could this mind mapping tool do this for me?
This mind mapping software could produce a mind map for me within seconds. As one student writes in a testimonial on the website:
“I post my own lecture notes to generate a very concentrated mind map for me. I don’t have to spend 3-6 hours writing my own mind maps, which I often can’t do very well.”
Another person leaves a five-star review, “No more messy brainstorming”.
However, all of this completely misses the point of mind mapping.
The process of mind mapping is just as important as the final, often messy, mind map.
When I mind map, I’m not concerned about creating a work of art or saving time (it takes as long as it takes to understand a topic). I want to take my time, settle into the process, and avoid feeling rushed. Mind mapping by hand allows me to do this.

Creating a mind map on a computer screen quickly and outsourcing the job to AI puts me in a speedy, turbocharged frame of mind, which is not conducive to deep learning.
Mind mapping is a practice that forces me to slow down.
This slowing down is super important because the world around me is sending me signals to speed up and go faster and faster! When I’m in turbocharge mode, I’m more likely to get distracted and feel overwhelmed.
I’m trying to resist this frantic pace because I want to do things thoroughly and at my own speed. Watching a mind map get created within seconds isn’t what I want or need. It shifts me into overdrive mode, which makes it much harder to learn.
Mind mapping by hand also allows me to think deeply about ideas and how they are connected. The only way I can see those connections and understand them is by reading through the information, thinking about how I would convey that information as a picture and in mind map form.
When you outsource the process to mind mapping software, you don’t get the same deep understanding as you would if you took the time to do it yourself by hand. It feels superficial. To me, it feels like the McDonald’s of Mind Mapping: fast, convenient, but ultimately, not particularly nourishing for my brain.
Using mind mapping software also bypasses something else that brings me joy and satisfaction: it feels really nice to work with my hands.
As Rosen says, “We have a human need to see, touch and make things with our hands”.
Making a mind map with your hands may not be quick, easy, or convenient, but it provides a very rewarding experience for your brain and soul. Personally, it makes me feel calm, grounded, and more connected to ideas, myself, and the world.
I don’t want to be ignorant or closed-minded. This is why I created a free account with this mind mapping AI tool and attempted to generate three mind maps.
The first mind map was on an article I’d read. The mind map focused on just a small section of the article (conspiracy theories). If I hadn’t read the entire article, I would have missed the important science on this topic.
The second mind map was on creating a meal plan for a trip away. Although the mind map provided some ideas, I was left feeling dissatisfied and uninspired. You can see my hand-drawn mind map on a meal plan, which I created for a family trip, compared to the AI-generated one below.
Which mind map do you prefer?


For the third and final mind map that I tried to create, I entered the following prompt:
“Create a mind map on the book ‘Die with Zero’ by Bill Perkins?”
I encountered this error message:
“System resources have been exhausted. Please try again later.”

Instead of feeling frustrated, I was grateful for this message as it highlighted another problem with using mind mapping software: when the tech goes down or power goes out, you are rendered helpless. It also reminded me of how energy-intensive AI is to run.
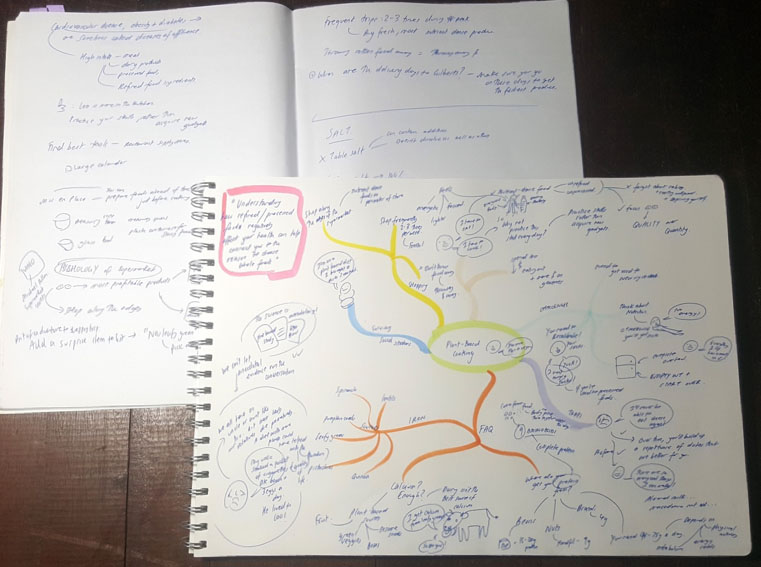
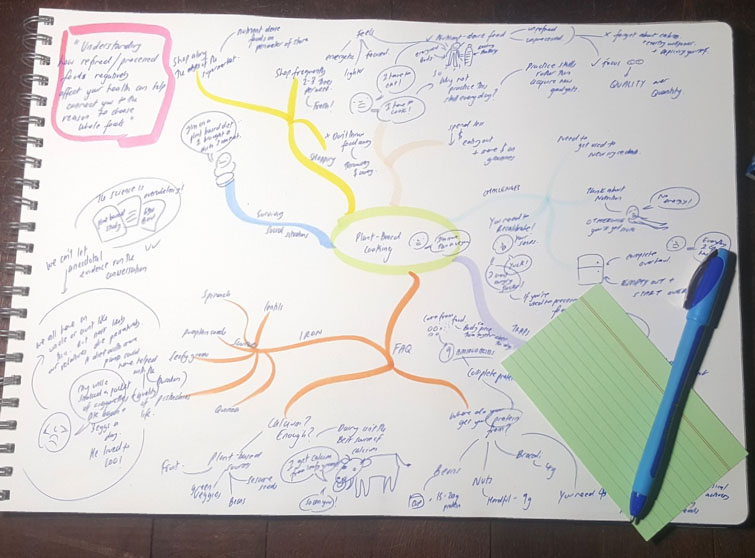
I went away and mind mapped this book by hand (I’d just finished reading it and had marked up several ideas). You can see the mind map I created below (it took me approximately 40 minutes to do).

I was curious to see if my mind map would resemble the one the mind mapping software generated. So the next day, I entered the same prompt again. Less than 3 seconds later, a mind map appeared on the screen (you can see it here). Was this a mind map on the same brilliant book I’d just read?
It seemed like AI slop.

I felt disconnected from the ideas. The spirit of the book just wasn’t there! I preferred my own mind map.
There is a freedom in mind mapping by hand, away from screens and without AI. The freedom comes not only from using your hands, brain, and creativity, but also from being able to focus on the task at hand.
It’s all too easy to get distracted when working on a computer. That’s why I have set up a dedicated space in my office, away from screens, where I do my mind mapping practice.

Mind mapping is a sacred practice for me. Doing it on a computer and outsourcing the process feels abstract and detached. I can see and feel what is being lost from the process.
Some tech enthusiasts may label me a “luddite”, but as Rosen says, “not every new thing is an improvement on the old”.
I say, stick with what works. Let’s not overcomplicate something that is simple but highly effective when it comes to learning. Put aside your fear of creating messy mind maps, step away from the screen, and enjoy the experience of making a mind map by hand.
This usually comes with shiny new pens, fresh notebooks and renewed hope and optimism. But I recently heard someone say:
“I can’t believe it’s already the end of January . . . so much has happened. I feel tired.”
Can you relate?
A lot has been happening in the world. It’s easy to feel overwhelmed by the news, let alone the tsunami of information we’re bombarded with online.
If you’re feeling overwhelmed and tired (like many people are), let’s try to make life a little easier for ourselves. In this article, I share a strategy you can use to make difficult things feel easier to do. I also share how you can apply the strategy to studying challenging subjects.
I remember having a brief conversation with a year 11 student at the start of the pandemic. It went something like this . . .
Me: How are you feeling given the situation (i.e., COVID-19)?
Year 11 Student: Some of us are stressed but not because of COVID. It’s because of what our teachers have just said to us.
Me: What have your teachers been saying to you?
Year 11 Student: They keep saying this year is going to be really hard. The subjects are going to be much, much harder.
Driving home from the talk, I couldn’t stop thinking about what this student had said as well as the worried look in her eyes.
Here’s what happened . . .
I was booked to deliver a presentation to 150 year 10 students. My talk was scheduled for the last period of the school day.
In case you’re not aware, the last period of the school day is not an ideal time slot for a guest speaker. It’s usually a tough gig, as students are tired and they just want to go home.

When I arrived at the venue to set up my gear, I spotted two teachers. I approached them and introduced myself to them as the guest presenter. One of them said in an alarmed, panicky tone:
“Oh! You’re the guest speaker? I need to warn you that these students are a horrible group. They do not warm to guest speakers!”
She continued. . .
“Does your talk have a structure to it? Do you know what you’re talking about? These year 10s are a really hard group to work with!”
I felt my stress levels begin to rise, and by accident, I knocked my glass of water off the stage, and it broke. Glass shattered everywhere. Instead of helping me pick up the glass, the teacher said:
“Look! It’s a sign of things to come!”
At this point, the young IT guy arrived to help connect my laptop to the AV system. He overheard this teacher talking about what a bunch of ratbags these students were. His expression was a combination of shock and horror. He said to her:
“Why are you saying this to our guest presenter? I don’t think it’s helpful.”
The teacher reacted defensively. She blurted out, “She needs to know! It’s important we tell her!” and then she left in a hurry.
I took some deep breaths and continued setting up my stuff.
The students arrived.
I delivered the talk.
The talk went really well. Phew!
It turns out these students weren’t horrible at all. They were a normal group of students who happened to be a bit tired and over it (it didn’t help that it was a boiling hot day).
That day, I learnt an important lesson: Worrying about how difficult something might be doesn’t help. It just uses up your precious brainpower and energy, which you could have spent doing something else (i.e., something more productive).
Whenever I fixate on how hard something will be, I’m filled with fear. Imposter syndrome and self doubt kick in (“Will I be able to do this? What if I fail and it turns out to be a total flop?”). This usually leads to a bad case of avoidance and procrastination.

In the book Make It Stick, Peter Brown explains:
“A fear of failure can poison learning by creating aversions to the kinds of experimentation and risk taking that characterize striving, or by diminishing performance under pressure, as in a test setting.”
If you feel worried that you’re not going to be able to perform well in a subject, this is going to use up a big part of your working memory capacity. Instead of thinking about the content, you’ll be thinking, “Am I going to be able to do this? What if I can’t? Should I drop the subject?”.
In short, you’ll have dramatically less brainpower available for learning.
There’s a simple question I ask myself when something feels hard. And it’s this . . .
How can I make this behaviour easier to do?
Professor BJ Fogg calls this the Breakthrough Question. According to Fogg, there are three ways you can make any behaviour easier to do:

In his book Tiny Habits, Fogg explains:
“Regardless of what your aspiration is, increasing your skills, getting tools and resources, and making the behaviour tiny are what makes things easier to do. . .
Sometimes all you’ll need is the right tool to make a new habit easier to do, like using skinny floss [for flossing teeth], and other times all you have to do is scale the behaviour back to its tiniest version, such as flossing just one tooth. Think of making something easy to do as a pond with three different ways to enter the water. Whether you jump off the dock, wade in at the beach, or drop in from a rope swing, you’ll soon be swimming in the same water.”
In other words, you have options!
There are many things you can do to make studying those ‘hard’ subjects a little easier.
With that in mind, here is a short list of behaviours and ideas that will help you get a better handle on your challenging subjects:
If you can focus better, you can learn and retain more information. If you constantly check your phone, put it on silent and away from your body before you sit down to study. My phone lives in pocket number 1 of a vertical wall hangar in my dining room (well away from my workspace).
Study strategies such as active recall (e.g., flashcards) and dual coding (e.g., mind mapping) are more effective than rereading and highlighting your notes. Like any new skill, they take a little time to get used to, but they’ll save you a lot of time in the long run.
Some textbooks explain ideas better than others. The textbook on your school booklist is not the only one or necessarily the best one out there. You don’t need to feel wedded to it. Check out other study guides and resources.
A good night’s sleep allows you to focus better in class, retain more information and feel better. Make sleep your top priority. Here are some behaviours I engage in to get more and better sleep:
In the evening, I put my phone away in another room to charge (and I don’t touch it until the next day)
I don’t look at any screens at least one hour before bed
I go to bed at the same time and wake up at the same time everyday
Create a system to organise your notes, past exam papers and handout sheets. Over time, you may need to tweak and refine your system, but that’s okay. I’ve been tweaking and refining my system for years.
For example, I used to store all my mind maps in an A3 flip file (in no particular order). But when things started to get out of control, I switched to cataloguing them alphabetically.
If you’re confused, don’t suffer in silence. Ask your teacher for help. That’s their job. If you feel shy asking a question in front of the class, approach your teacher after class.
Make life easier for your future self by jotting down key ideas in class. If something is confusing, make a note (you can focus on that in a study session at home). Your memory has limits, and if you don’t write it down, chances are you won’t be able to remember it.
If you feel overwhelmed by the idea of doing several hours of study each day, start with just five minutes. Five minutes of study is infinitely better than doing nothing!
Once you’ve developed the habit of sitting down and studying for 5 minutes, you can ramp it up. But start small.
When you manage to sit down and do a little study, congratulate yourself. Say to yourself, “Good job!” This positive reinforcement makes us feel good, which helps us establish a study habit.
When your teachers say, “This subject is going to be really hard”, I think they’re trying to communicate to you, “You need to sit down and study. You can no longer wing it.” They may be afraid that you’re not taking things seriously.
Instead of worrying, be in action. Pick up some flashcards and start testing yourself. Tidy your desk. File away your notes from today. You’ll feel better and do better if you focus on doing the things that make studying that subject a little bit easier.
When you start using this strategy, it can feel clunky and awkward. It requires some mental effort to get going.
Why can it feel hard to start mind mapping?
Because it isn’t a habit (not yet, anyway). But once mind mapping becomes a habit, it can feel easy and deeply rewarding.
So, how do you get to that point where mind mapping feels easy? Even fun?
In this article, I will explore how you can create a habit of mind mapping. I’ll show you how to remove friction or pain points so it’s much easier to put pen to paper and absorb ideas.
Let’s start by looking at what gets in the way and stops many people from creating mind maps in the first place. I’ll also share some strategies you can use to overcome each of these barriers.

When you look at a mind map with all the pictures and different colours, it seems like something that would take a fair amount of time and effort to create.
If you’re comparing mind mapping to the time it takes to read your book passively, then yes, mind mapping will take more time. But you need to understand that reading your book passively is not an effective way to learn. In contrast, mind mapping is super effective.
People often fall into the trap of trying to make their mind maps look like works of art. Try lowering your standards and allowing yourself to make a mess when you mind map. This will speed up the process.
Another time trap is trying to mind map as you read and trying to mind map everything you read. I find it’s much faster to read and tab key ideas worth mind mapping later on. Once I’ve finished reading either the chapter or book, I then commence the mind mapping process. By this stage, I have a better understanding of the key ideas and what’s worth mind mapping.
Some people get hung up on the way their mind maps look. They can’t stand looking at messy pictures and scribbled words. If that’s you, perhaps you could take your drawing skills to the next level with some practice and sketch classes. But it’s not necessary.
Mind maps are not there to look pretty. They are there to help you learn. I am a big fan of badly drawn mind maps. If you look at my mind maps from university, they’re not works of art but they contain loads of important ideas. And that’s what matters most when it comes to learning.
Here’s a simple hack: invest in a set of nice, vibrant coloured pens. A bit of colour on the page will make your mind maps more visually appealing.

Mind mapping is straightforward. You draw a central image, curved lines, a few pictures, and write down key ideas. That’s it!
It’s not something you need to read a book about. You don’t need to enrol in a 10 week program to learn how to do this.
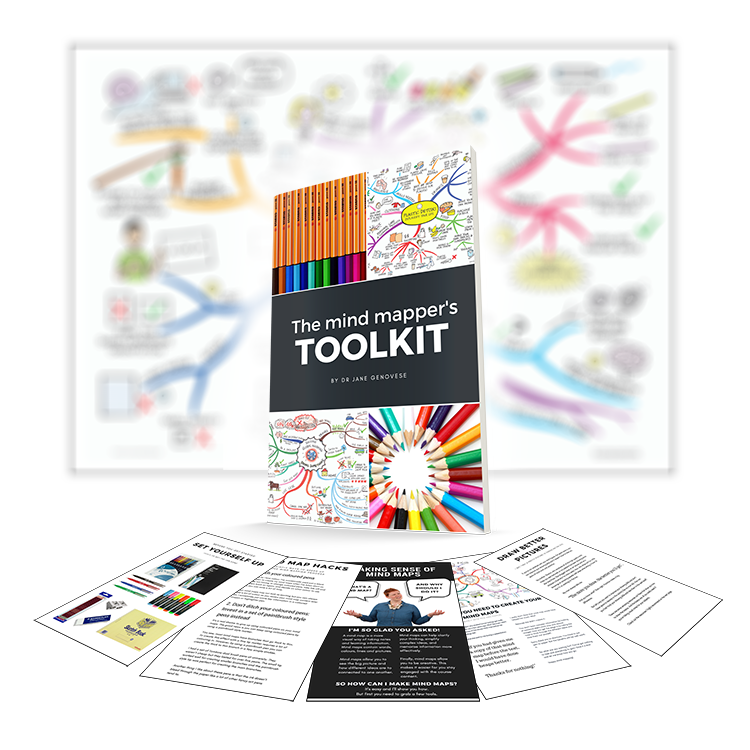
If you want some tips on how to mind map, check out my free Mind Mapper’s Toolkit. It’s a quick and easy read.
It’s important to realise that the first time you engage in any new behaviour, it will most likely feel strange and uncomfortable. You may feel a bit clumsy and awkward. You may have questions, “Am I doing this right?”. All of this is normal and to be expected.
Even something as simple as the pen you mind map with can make or break the mind mapping process.
You’ve probably noticed that some pens don’t feel pleasant to write or draw with. For instance, I’m not a fan of the popular Sharpie pen range. I don’t like the way these pens bleed through the page. And I really don’t like the way they smell.
These may seem like minor irritations and quirks, but trust me, they’re not. Your mind mapping experience will be diminished by a pen that doesn’t feel good in your hand or on the page. And any behaviour that feels unpleasant is much harder to sustain.
I’ve since ditched my Sharpie pens. I mind map with a uniball signo pen and non-toxic Tombow paintbrush pens. As far as coloured pens go, I won’t lie, these pens are pricey! But you can find them online for $25 cheaper than in Officeworks (a big stationery store in Australia).
What I love about these pens is that they are super easy to use, feel lovely to strike across the page, and they won’t leave you with a splitting headache from the ink smell.
Here are some things that have helped me to establish this habit in my life:
When is the best time for you to mind map? Where in your day can you easily slot in a 15 minute mind mapping session?
I like to mind map when I feel fresh and mentally alert (first thing in the morning).
Find an activity that you do every day without fail (e.g., having a shower, eating breakfast or dinner) and use that to prompt you to start a mind mapping session.
For instance, after I have completed my morning routine (workout, breakfast and shower), that’s my cue to sit down and start mind mapping.
Before you start your session, set yourself up with everything you need to mind map. I like doing this the night before my morning mind mapping sessions.
Before I go to bed, I lay out a sheet of A3 paper, my pens, and my timer. The book I am mind mapping is open on the page where I need to start working. The next day, all I need to do is sit down, start my timer, pick up a pen, and away I go!

What’s one thing that can slow down the mind mapping process?
For me, it’s digital distractions (e.g., text messages and notifications).
You probably already know the things that tend to derail you. Create a barrier between you and those things.
For example, my phone is the biggest distraction for me. How do I deal with this? Before I start mind mapping, I take my phone and place it away from my body in another room.
This signals to my brain that my phone is off-limits and it’s time to knuckle down and focus on my work.

Don’t wait until you feel pumped and inspired to create a mind map. Set a timer for 10-15 minutes and start mind mapping (regardless of how you feel).
If you miss a day, don’t beat yourself up. It’s no big deal. Just say to yourself, “Tomorrow is a new day. I will get back into mind mapping then”.

When the timer goes off at the end of your mind mapping session, say to yourself, “Good job!”. Do anything that makes you feel instantly good. I often clap my hands or do a fist pump.
According to Professor BJ Fogg, the secret to wiring in any new habit is to release a positive emotion within milliseconds of engaging in the new behaviour. When you release positive emotions, this releases dopamine in your brain. This makes it more likely that you’ll engage in this behaviour again.

I mentioned this before, but it’s important to repeat it: don’t go cheap with your mind mapping tools. Invest in good pens and paper. My favourite pens for mind mapping are uniball signo pens (0.7 tip) and Tombow paintbrush pens. Regarding paper, I love using Rhodia paper (it feels like your mind mapping on butter).
It may sound a little dramatic, but mind mapping changed my life. I used to read books and then feel frustrated that I couldn’t retain much information. But now, I have a strategy I can easily use to help me understand and remember complex ideas. This gives me confidence when it comes to learning new skills and information.
I encourage you to be playful with this strategy. Don’t get too hung up on how your drawings look. Your top priority is to leave perfectionism at the door and have some fun. Because when it comes to mind mapping, done is better than perfect.