
Study is such a vague term.
Many students know they should study, but they’re not exactly sure what study is and what they should be doing.
This is a problem.
If you don’t know what study is and what effective study looks like, chances are you probably won’t be able to do it.
You’ll be winging it.

How can you develop a solid study habit?
I’m going to breakdown what study is and how you can study in the most effective way to optimise learning. I’ll also share a simple way to combat procrastination and kick-start your study sessions.
Study is where you spend time understanding ideas. It also involves cementing ideas into your memory.
Study is different from collecting information (e.g., downloading articles, buying books, and saving videos to watch later). Study involves taking that information, spending time trying to understand ideas, and making connections between different ideas.
Let’s be clear . . .
Study is different from working on homework and assignments.
Homework and assignments are relatively straightforward. The teacher tells you exactly what you need to do. If you’re not sure what to do, you can ask for clarification.
Study is not so clear cut.
Unless you have a private tutor, a friend, or teacher who spells out what you need to do in your study sessions (e.g., “Go test yourself with this flashcard deck tonight and then test yourself again in two days’ time”), no one is telling you what to study and how to do it. This is something you need to figure out for yourself.
The good news is there are simple things you can do to help you pinpoint what you need to study (more on this shortly).
You will forget most of what the teacher says in class unless you make an effort to retain it. This is why study is so important. Study is what embeds ideas into your memory.
In psychology, there’s a concept known as the Forgetting Curve.
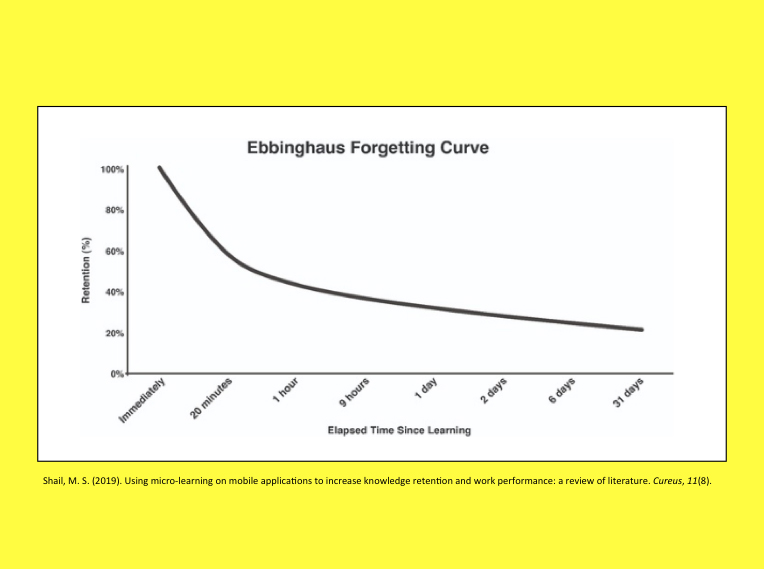
The idea is simple: information leaks out of your brain over time. But by studying, you can slow down the rate of forgetting and even interrupt it completely.
Most of us have unrealistic expectations when it comes to learning new ideas and skills.
A lot of students expect learning to be fast and easy like in the science fiction film The Matrix.
There’s a famous scene in The Matrix where Neo gets plugged into the ‘Knowledge Upload Machine’. A floppy disk with combat skills is inserted into the machine and Neo rapidly acquires all the skills of jujutsu.

Many of us want instant results like Neo. If we can’t understand something straight away or nail the skill the first time, we give up.
What do we do instead?
We run to things that deliver instant gratification (e.g., TikTok, video games, and YouTube). These things bring us temporary relief from the negative feelings and discomfort that arise when we are faced with challenging work.
But they also take us further away from our goals.
Here’s the reality of study . . .
Study isn’t easy.
It takes work.
It takes time.
But if you can get yourself to sit down and do a little bit of study every day, you’ll see that over time all those study sessions will add up to something solid.
It’s easy to fall into the trap of thinking of study as being one giant overwhelming task. This makes the work feel scary and extracts all the fun from the process.
When we see study as being overwhelming, we feel stressed and when we feel stressed about any task, we are more likely to procrastinate.
So, let’s break the process down into more concrete simple tasks to make it seem more manageable and less threatening.
Before you sit down to study, set yourself up with the things you need to learn. Get out your pens, paper, notes, textbook, flashcards, a glass of water, post-it notes, noise blocking earmuffs/headphones, etc.
Is there anything that could distract you when you study?
Deal with distractions from the outset. Create a barrier between you and Big Tech (this way it will be hard to run to the fun stuff when things get tricky with your work).
The simplest and most powerful thing you can do is take your phone and place it away from your body in another room. Turn it off or put it on silent.
If there is any visual clutter in your space, collect it up in a box and put it in another room. Being surrounded by piles of clutter can increase your stress levels and make it hard to focus.
Setting yourself up is an important first step for several reasons:
1. It will help you get into a state of flow with your learning;
2. You’re warming your brain up and mentally preparing it to do the work; and
3. You’ll be less distracted which will allow you to learn more in less time.
Once you’ve set yourself up, this bring us to the next step . . .
Select a subject and then ask yourself these simple questions:
1. What didn’t I understand in class today?
2. What topics were confusing?
3. Where are the gaps in my knowledge?
These questions can be difficult to answer several hours after a class, especially if you didn’t take any notes in class.
This is why it’s a good idea to scribble down on a post-it note anything you don’t understand in class. This post-it will help guide your study sessions later in the day.
If you can’t answer the above questions, here are some ways you can gain clarity on what you need to study:
• Check the unit content section of your syllabus. Focus on the content you have already covered in class. If any words are unfamiliar or confusing, that’s a clue you need to study those ideas. Why? Because you’re going to be assessed on this content at some point in the future.
• Test yourself with a practice test, past exam paper, or flashcards. Stumped by a question? There you go! That’s a sign you don’t understand this particular topic so well.
When you realise you’re a bit rusty on a concept or don’t understand something, don’t feel bad. Instead, write the concept on a post-it note and tell yourself “Good job!” You’ve just pinpointed something to study. You’re one step closer to getting a better understanding of the content.

You’ve figured out what you need to study. Now it’s time to decide on the best strategy to learn the content.
The strategy you select will depend on where you’re at on your learning journey and what you need to be able to do with the content.
I see learning as being made up of two distinct parts:
• Part 1: You first need to understand the information and make sense of it
• Part 2: You need to commit the information to memory so you can easily retrieve it when you need it (e.g., in a test or exam)
Doing part 1 well will help you with part 2 (remembering the information). But it won’t be enough to cement the ideas into your memory. You’ll need additional strategies for this.
Here are some ideas to help you with each part of your learning journey . . .
When you are trying to understand a topic
• Grab a sheet of A3 paper and draw out the ideas as you read
• Watch an animated video explaining the topic
• Ask for help from an expert (e.g., teacher), friend, or Google
• Access children’s books or graphic novels on the topic
When you need to remember information on a topic
• Do a practice test
• Teach a friend, a pet, or the wall
• Write or draw out as much as you can remember
• Record yourself explaining an idea
If you want to remember something, you need to practice remembering that information.
It’s okay to incorrectly recall the information but it’s critical that you find out what the right answer is immediately. If you do this, you won’t embed the incorrect information!
Steer clear of studying in the following ways:
• Passively rereading your books and notes
• Highlighting your notes
• Copying out your notes
• Summarising your notes or a chapter (this is worth doing in the early stages of learning something new but it’s not a good way to prepare for a test or exam).
These are what I call ‘Feel Good, Get Nowhere’ study strategies. They feel good to use because they’re easy. But they get you nowhere because they’re not very effective ways to learn.

We live in an environment that has trained us to seek out pleasure and immediate gratification. This makes sitting down to study incredibly difficult for a lot of people.
Study forces us to face up to the fact that we don’t know everything and/or we may suck at some things (at least to begin with).
This explains why you probably won’t feel comfortable when you first sit down to study. You’ll feel the urge to distract yourself. But resist the urge.
Sit with the discomfort. Don’t run from it. Push through it.
Use an electronic timer to time your study sessions (25 – 45 minutes). This way your brain knows there’s an end point and you won’t be stuck in the discomfort forever.
When the timer goes off, give yourself a break. These breaks will help you to mentally re-energise.
A recent study from the University of Sydney confirmed this. Researchers found taking a five-minute unstructured rest break improved students’ ability to focus and learn.
Force yourself to step away from your computer screen and go outside. Look up at the sky and some trees. If you can, add some movement into your breaks.
You are not a machine. In order to engage in quality study, you need to take regular breaks.
We’ve just broken down study sessions into five simple steps:
Step 1: Prepare your environment
Step 2: Pinpoint what you need to study
Step 3: Choose your study strategy
Step 4: Embrace the pain and go!
Step 5: Take a break
Your first few study sessions will require a bit of willpower to carry out. But why would you want to rely on your willpower reserves all the time?
That’s far too draining.
This is where creating a study habit can help to streamline the process and conserve your mental energy.
Most of us have easy access to an abundance of endless entertainment options. There are many cues in our environment that remind us of the fun things we could be doing instead of study.
If you can establish a study habit, you eliminate all these options from your life for that part of your day.
Once you decide when and where you’re going to study, you’re no longer overwhelmed by all the choice. Your brain knows exactly what it needs to do.
Here are some examples of tiny study habits:
1. After I have a snack, I will take my phone and place it in another room (on silent).
2. After I finish dinner, I will take out my flashcards and place them on my desk.
3. After I unpack my bag, I will grab a post-it note and ask myself “What didn’t I understand in class today?” I will write down one thing.
4. After I have a shower, I will place my textbook on my desk.
5. After I hear a concept I don’t understand, I will write it down on a post-it note.
6. After I have pinpointed what I need to study, I will ask “Which strategy will I use to learn this?”
7. After I hear the timer go off, I will get up and go outside.
These study habits are tiny but that’s the whole point. When we are starting out, we keep the study behaviour small so it feels fun and easy for the brain.
“Study” can sound mighty grim. It can bring to mind images of staying up late into the night cramming. It can feel repetitive, dull, and pointless.
“Study” sounds like what your teachers and parents want you to do. It doesn’t sound like something you’d do for fun.
Frankly, the term “study” comes with a lot of baggage.
But that’s okay. There’s no reason why you need to use the word.
You can create a mind map or test yourself with a flashcard desk without calling it “study”. Just do the tasks you need to do to understand and remember the information. There’s no need to name the tasks as “study”.
If you do want to call it something, try using a fun and playful term that has no baggage. For example, you could frame study as doing bicep curls for your brain.
Think about the things you are good and confident at doing now. What were you like when you first started? You probably weren’t great!
But you kept at it and over time, you got better. Your skills and confidence developed.
The same thing applies with study. You’re not going to be amazing at studying to begin with. You’re going to feel awkward and clumsy as you wrestle with new ideas. But cut yourself some slack.
Approach your study sessions as mini experiments. Go into them thinking, “Let’s test out this strategy and see how it goes”. If it doesn’t work, you can try again or try something different in your next study session.
This usually comes with shiny new pens, fresh notebooks and renewed hope and optimism. But I recently heard someone say:
“I can’t believe it’s already the end of January . . . so much has happened. I feel tired.”
Can you relate?
A lot has been happening in the world. It’s easy to feel overwhelmed by the news, let alone the tsunami of information we’re bombarded with online.
If you’re feeling overwhelmed and tired (like many people are), let’s try to make life a little easier for ourselves. In this article, I share a strategy you can use to make difficult things feel easier to do. I also share how you can apply the strategy to studying challenging subjects.
I remember having a brief conversation with a year 11 student at the start of the pandemic. It went something like this . . .
Me: How are you feeling given the situation (i.e., COVID-19)?
Year 11 Student: Some of us are stressed but not because of COVID. It’s because of what our teachers have just said to us.
Me: What have your teachers been saying to you?
Year 11 Student: They keep saying this year is going to be really hard. The subjects are going to be much, much harder.
Driving home from the talk, I couldn’t stop thinking about what this student had said as well as the worried look in her eyes.
Here’s what happened . . .
I was booked to deliver a presentation to 150 year 10 students. My talk was scheduled for the last period of the school day.
In case you’re not aware, the last period of the school day is not an ideal time slot for a guest speaker. It’s usually a tough gig, as students are tired and they just want to go home.

When I arrived at the venue to set up my gear, I spotted two teachers. I approached them and introduced myself to them as the guest presenter. One of them said in an alarmed, panicky tone:
“Oh! You’re the guest speaker? I need to warn you that these students are a horrible group. They do not warm to guest speakers!”
She continued. . .
“Does your talk have a structure to it? Do you know what you’re talking about? These year 10s are a really hard group to work with!”
I felt my stress levels begin to rise, and by accident, I knocked my glass of water off the stage, and it broke. Glass shattered everywhere. Instead of helping me pick up the glass, the teacher said:
“Look! It’s a sign of things to come!”
At this point, the young IT guy arrived to help connect my laptop to the AV system. He overheard this teacher talking about what a bunch of ratbags these students were. His expression was a combination of shock and horror. He said to her:
“Why are you saying this to our guest presenter? I don’t think it’s helpful.”
The teacher reacted defensively. She blurted out, “She needs to know! It’s important we tell her!” and then she left in a hurry.
I took some deep breaths and continued setting up my stuff.
The students arrived.
I delivered the talk.
The talk went really well. Phew!
It turns out these students weren’t horrible at all. They were a normal group of students who happened to be a bit tired and over it (it didn’t help that it was a boiling hot day).
That day, I learnt an important lesson: Worrying about how difficult something might be doesn’t help. It just uses up your precious brainpower and energy, which you could have spent doing something else (i.e., something more productive).
Whenever I fixate on how hard something will be, I’m filled with fear. Imposter syndrome and self doubt kick in (“Will I be able to do this? What if I fail and it turns out to be a total flop?”). This usually leads to a bad case of avoidance and procrastination.

In the book Make It Stick, Peter Brown explains:
“A fear of failure can poison learning by creating aversions to the kinds of experimentation and risk taking that characterize striving, or by diminishing performance under pressure, as in a test setting.”
If you feel worried that you’re not going to be able to perform well in a subject, this is going to use up a big part of your working memory capacity. Instead of thinking about the content, you’ll be thinking, “Am I going to be able to do this? What if I can’t? Should I drop the subject?”.
In short, you’ll have dramatically less brainpower available for learning.
There’s a simple question I ask myself when something feels hard. And it’s this . . .
How can I make this behaviour easier to do?
Professor BJ Fogg calls this the Breakthrough Question. According to Fogg, there are three ways you can make any behaviour easier to do:

In his book Tiny Habits, Fogg explains:
“Regardless of what your aspiration is, increasing your skills, getting tools and resources, and making the behaviour tiny are what makes things easier to do. . .
Sometimes all you’ll need is the right tool to make a new habit easier to do, like using skinny floss [for flossing teeth], and other times all you have to do is scale the behaviour back to its tiniest version, such as flossing just one tooth. Think of making something easy to do as a pond with three different ways to enter the water. Whether you jump off the dock, wade in at the beach, or drop in from a rope swing, you’ll soon be swimming in the same water.”
In other words, you have options!
There are many things you can do to make studying those ‘hard’ subjects a little easier.
With that in mind, here is a short list of behaviours and ideas that will help you get a better handle on your challenging subjects:
If you can focus better, you can learn and retain more information. If you constantly check your phone, put it on silent and away from your body before you sit down to study. My phone lives in pocket number 1 of a vertical wall hangar in my dining room (well away from my workspace).
Study strategies such as active recall (e.g., flashcards) and dual coding (e.g., mind mapping) are more effective than rereading and highlighting your notes. Like any new skill, they take a little time to get used to, but they’ll save you a lot of time in the long run.

Some textbooks explain ideas better than others. The textbook on your school booklist is not the only one or necessarily the best one out there. You don’t need to feel wedded to it. Check out other study guides and resources.
A good night’s sleep allows you to focus better in class, retain more information and feel better. Make sleep your top priority. Here are some behaviours I engage in to get more and better sleep:
In the evening, I put my phone away in another room to charge (and I don’t touch it until the next day)
I don’t look at any screens at least one hour before bed
I go to bed at the same time and wake up at the same time everyday
Create a system to organise your notes, past exam papers and handout sheets. Over time, you may need to tweak and refine your system, but that’s okay. I’ve been tweaking and refining my system for years.
For example, I used to store all my mind maps in an A3 flip file (in no particular order). But when things started to get out of control, I switched to cataloguing them alphabetically.
If you’re confused, don’t suffer in silence. Ask your teacher for help. That’s their job. If you feel shy asking a question in front of the class, approach your teacher after class.
Make life easier for your future self by jotting down key ideas in class. If something is confusing, make a note (you can focus on that in a study session at home). Your memory has limits, and if you don’t write it down, chances are you won’t be able to remember it.

If you feel overwhelmed by the idea of doing several hours of study each day, start with just five minutes. Five minutes of study is infinitely better than doing nothing!
Once you’ve developed the habit of sitting down and studying for 5 minutes, you can ramp it up. But start small.
When you manage to sit down and do a little study, congratulate yourself. Say to yourself, “Good job!” This positive reinforcement makes us feel good, which helps us establish a study habit.
When your teachers say, “This subject is going to be really hard”, I think they’re trying to communicate to you, “You need to sit down and study. You can no longer wing it.” They may be afraid that you’re not taking things seriously.
Instead of worrying, be in action. Pick up some flashcards and start testing yourself. Tidy your desk. File away your notes from today. You’ll feel better and do better if you focus on doing the things that make studying that subject a little bit easier.
Research shows active recall (aka retrieval practice) is a highly effective strategy for remembering information. This strategy will take your studies and your grades to the next level.
Active recall involves bringing information to mind without looking at your books and notes.
I have spent the last 30 days experimenting with this excellent learning strategy. In this blog, I’ll share what I did and how I kept the process interesting for my brain.
I no longer need to study for tests and exams.
So, why did I spend 30 days using active recall strategies?
In my line of work, I need to constantly come up with new and original content to present to students. I also need to memorise this content. Why?
Because if I was to read from a sheet of notes or text heavy slides that would be really boring for students. I want to connect with students and to do this, I have to be able to deliver the content off the top of my head with speed and ease.
This is where active recall enters the picture.
Active recall helps to speed up the learning process. It allows you to learn more in less time.
Below I share some of the ways I use active recall to learn new presentation content. Keep in mind, you can use all of these strategies to prepare for an upcoming test or exam.
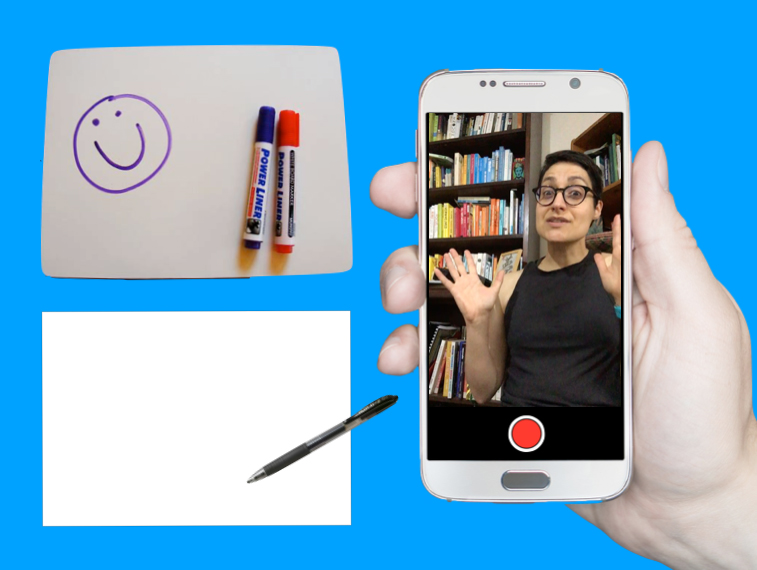
Whiteboards are wonderful learning tools. Here’s how I use a whiteboard to do active recall . . .
I push my speech notes to the side, so I can’t look at them. Then I grab a marker and say to myself, “What can you remember? Go!”.
I write out everything I can remember on the whiteboard. Once I’ve exhausted my memory, I pick up my notes and check to see how I went (using a red marker to make corrections).
No whiteboard? No problem!
I pick up a pen and sheet of paper and start scribbling out whatever I can remember on the topic. When I get stuck, I pause and take a few deep breaths as I try to scan my brain for the information.
I regularly remind myself that it is okay to not remember the content. “This is how the process goes!”, I say to myself. There is no point beating myself up. That only leads to feelings of misery and not wanting to do active recall practice.
After having a shot at it, I take out my notes, pick up a red pen, and begin the process of checking to see how I went.
Sick of writing? I get it.
Try drawing out the information instead. Alternatively, you can use a combination of words and pictures, which is what I often do.
Grab a blank piece of paper (A3 size is best) and create a mind map of everything you can remember on a topic (no peeking at your notes). Then check your notes or the original mind map to see what you remembered correctly and incorrectly.
Writing and drawing out information can take time. If you want to speed up the process, you can talk to yourself.

But don’t do this in your head. It’s too easy to just say “Yeah, yeah, I know this stuff!”. You need to speak it out loud as this forces you to have a complete thought. Then, check your notes to see how you went.
The only downside with this approach is you don’t have a tangible record of what you recalled, which brings me to the next strategy . . .
I make videos of myself presenting the content (without referring to my notes). Although I use special software and tools to make my videos, you don’t need any fancy equipment. Your phone will do the job. Here’s what you can do . . .
Set your phone up so the camera is facing you. Now hit the record button and tell the camera what you’re going to do active recall on. Have a shot at explaining the idea. Then stop recording and hit the play button.

Watching yourself struggle to remember information is often hard viewing. But this is where it’s super important to double down on telling yourself kind thoughts (e.g., “I’m still learning this content. It’s going to be rusty and feel clunky – that’s okay!”).
You need to take a deep breath and keep watching because the video will give you valuable feedback.
For example, if you stop midsentence and you don’t know how to proceed, that tells you something: you don’t know this stuff so well! Make a note. This part of the content needs your attention.
Hand your notes over to a friend, parent, or sibling. Now get them to ask you questions on the content.
I sat with my mum and showed her a print out of my slides for a new presentation. The slides were just pictures (no text).
As I went through the slides, I explained the ideas to mum. I made notes of any sections I was rusty on. Mum also asked lots of questions, which allowed me to think more deeply about the content.
When it came crunch time (a few days before the final presentation), I printed out my presentation slides (16 per page) and used each slide as a prompt. I’d look at the slide and say, “What do I need to say here?”.

Sometimes I wrote out what I’d be saying in relation to each slide (without looking at my notes). Then I checked my original notes to make sure I hadn’t forgotten anything.
It’s really important that you don’t skip the stage of checking to see how you went, especially as you become more confident with the content.
At times, I found myself thinking “I know this stuff! I don’t need to check my notes” but then another part would say, “You better just check . . . just to be on the safe side”.
I’m glad I forced myself to check because more often than not I would discover that I had missed a crucial point.
Zines are cute little booklets you can create on any topic you like. They are fun to make, so I thought I’d try making a mini zine on the main points of some new content I had to learn.
I folded up an A4 page into a booklet and then I sketched out the main points on each panel.
I create a deck of flashcards on some key ideas (question on one side and the answer on the back) and then I test myself with them.
I read the question and before flipping the card, I write out the answer on a sheet of paper or say it out loud. Then I check to see how I went.
The beauty of flashcards is they are small and portable (they can easily fit in your pocket or bag). Whenever you have a spare minute or two, you can get a little active recall practice in.
It’s not enough to do active recall just once on the content you need to learn. For best results, you want to practice recalling the information several times over a period of time.
I didn’t follow a strict schedule for the 30 days. I had my notes for each important chunk of information I had to learn pinned to eight different clipboards.
Every morning, I’d pick up a different clipboard and I’d practice that specific content. I knew as long as I’d had a good night’s sleep in between practice sessions that the information was being strengthened in my brain.
Doing active recall is a bit like doing a high intensity workout: it can be exhausting. But you must remember, just like a high intensity exercise session is an effective way to train and get fit, active recall is an effective way to learn. Unlike less effective strategies (e.g., rereading and highlighting), you can learn a lot in a short space of time with active recall.
The key is to expect the process to be a little uncomfortable. Don’t fight the discomfort. If you trust the process and persevere, it won’t be long before you begin to see amazing results.
Just because active recall is challenging to do that doesn’t mean you can’t have fun with it.
Using a combination of different active recall strategies is one way to keep things fresh and interesting for your brain. But you may wish to try the following things to add a little boost of fun to your active recall sessions:
• Use a different type of pen
• Use a different coloured pen
• Change the type of paper or notebook you use (e.g., instead of using lined paper, use blank A3 paper)
• Incorporate movement into your active recall sessions (e.g., walk and test yourself with some flashcards)
• Change your study environment (e.g., go to the library or study outside)

Like I said, active recall is challenging to do, especially when you first start learning new content. You can feel awkward and clumsy. For this reason, it’s easy to make excuses to get out of doing it (e.g., “I’m too tired”, “I’m not ready to do it”, and “It’s not the right time”).
This is where you need to harness the power of habits.
Find a set time in your day to do a little active recall practice. For instance, during my 30 days of active recall, I scheduled my practice sessions for first thing in the morning. I knew after I washed my face, I would sit down to practice.
Incorporating active recall into my morning routine worked really well for me. I was getting the hardest thing done first thing in the day. And once it was done, I could relax. It was done and dusted!
At a certain point, I became more confident with the content and I found I was on a roll. I felt motivated to do active recall.
This is when I started to look for spare moments in the day to squeeze in a few extra mini practice sessions.
For example, one day I found myself waiting in a car. I grabbed a paper shopping bag and started scribbling out the content onto the bag. As soon as I got home, I checked the shopping bag against my notes.
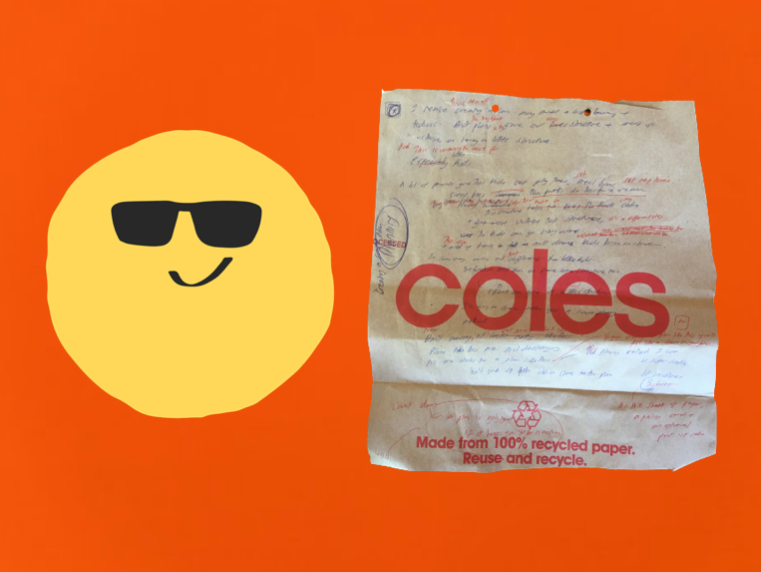
I hope you can see that there’s no one set way to do active recall. This is a highly effective strategy you can be creative with. As long as you’re testing yourself and checking to see how you went, you can’t go wrong.
And if you do make a mistake? It’s no big deal. If you check to see how you went, you won’t embed the error in your long-term memory.
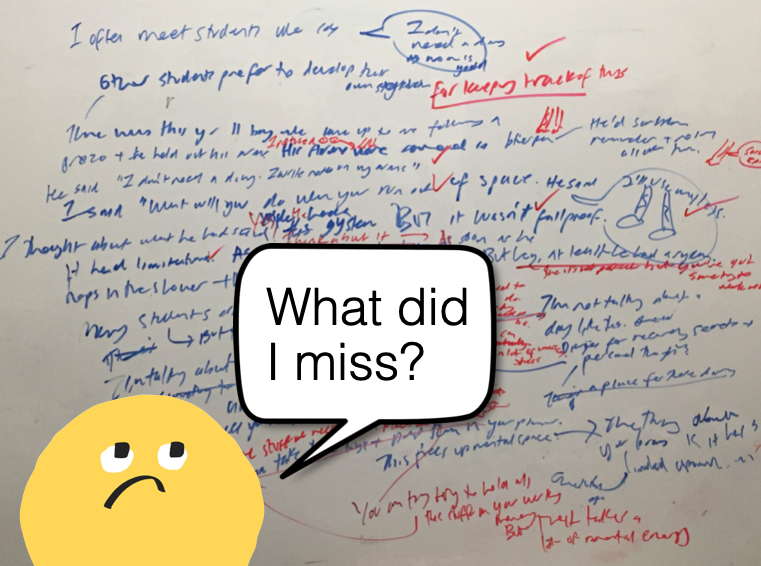
“I don’t need to use a diary/planner. My memory is good!”
Other students prefer to develop their own system.
For example, a year 11 boy came up to me following a presentation and he held out his arms. They were covered in notes to self, strategies from my session, and reminders he’d scribbled in blue pen.
He said he didn’t need a diary. Why? Because he could write reminders on his arms.
“What will you do when you run out of space on your arms?” I asked.
He didn’t miss a beat and quickly responded with, “I’ll use my legs”.
His system wasn’t fail proof but at least he had some kind of system. Many students don’t have a system to remind them of all their commitments.
How do I know?
Over the years, I’ve surveyed secondary students about their study and lifestyle habits.
What I’ve found is 70% of Australian secondary students say they have a school diary but they don’t use it.

Perhaps it’s because students associate this tool with having to do things that brings up feelings of discomfort. Or maybe they’ve felt forced to use a diary without anyone ever explaining the benefits of using one.
In this blog post, I’m going to explore whether you need to use a diary (you may not need one). If you decide this is a tool you want to use, I’ll share two simple tricks you can use to establish the habit of regularly using your diary.
Some people can get by without using a diary. But it’s not because they have greater mental powers or a superior intellect compared to other students.
You may not need a diary if:
1) Other people are micromanaging your life (e.g., your parents or boss); and/or
2) You don’t have a lot to do during the day or week (and therefore, there’s not much to remember).
Even if you can get by without a diary, it’s a good idea to develop the habit of using one. Here’s why . . .
In the not so distant future, you may have a part-time job with different shifts that vary from week to week. Perhaps you’ll find yourself studying at university with classes at different times and in different locations.
In other words, your life is going to be jam packed full of different activities and commitments.
It makes a difference to write down all of these activities in one place so you don’t forget what you need to do. A diary is a simple tool you can use to manage everything you need to do and bring a little order to the chaos of life.
When you get to this stage in your life, I’m also guessing that you won’t want your mum or dad doing everything for you. So, the sooner you can establish the habit of using a diary, the better!
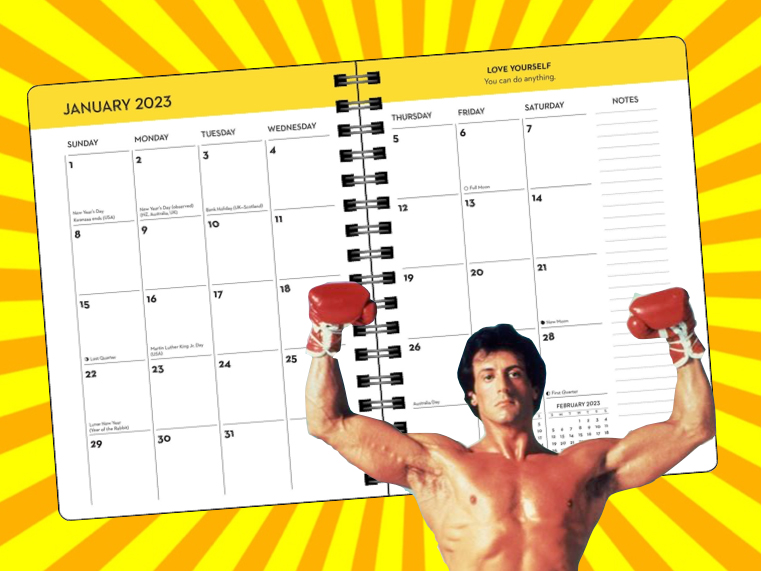
I buy the same diary every year (this one). Yes, it’s a bit pricey. But I figure I can afford to splurge $40AUD on a deluxe diary/organiser once a year.
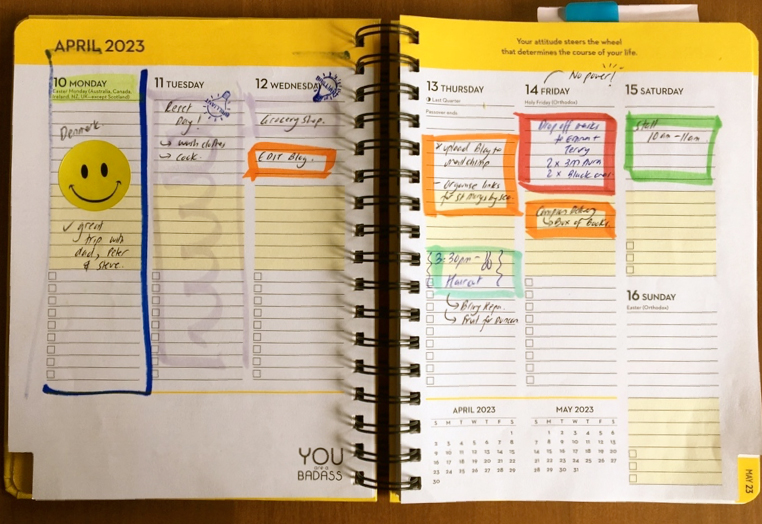
It has a bright yellow cover, which makes it easy to find when my house gets messy (and it gets messy!). You can view the entire week in one glance and there’s plenty of space to write and scribble (this makes it easy to plan and prioritise tasks). The cover also makes me smile (it states ‘YOU are a BADASS’).
I relate to this paper-based diary as being like my mini personal assistant. This tool lightens my mental load, decreases decision fatigue, and helps to keep me on track. It also prompts me to take action on certain tasks.
Every time I open up my diary, it tells me what I need to do, when I need to do it, and where I need to go.
“You have to go to the dentist at 8am on Monday.”
“The article is due on Thursday.”
“It’s mum’s birthday next Wednesday. Buy cake and pop round at 6pm”
Rather than holding all these random details in you working memory (and having them take up precious mental space), it makes sense to dump them in your diary.
We have a limited capacity to take in and process information at any one time. In a research paper called The magical number four in short-term memory psychological researcher Nelson Cowan argues that humans can only hold on average four chunks of information (plus or minus two) in their short-term memory.

If you’re trying to hold onto all these random bits of information in your brain (e.g., “Buy cake for mum on Wednesday” and “Dentist on Monday at 8am”) this is going to deplete your finite brain power.
By cultivating the habit of using a diary, you can free up your precious mental resources. This means you can allocate your brain power towards more important cognitive tasks (e.g., learning new ideas).
I’m going to share two simple tricks to make it really easy to use a diary.
As soon as the teacher says a test is coming up or an assignment is due, write it down in your diary. Do it immediately.
This will only take 10-30 seconds to do but it will save you a lot of stress and drama later down the track.
Open up your diary and look at it every day.
You need to find a place in your daily routine to slot in opening up your diary and looking at what’s coming up. It could be after you have dinner or after having a snack after school. Use a pre-existing habit to remind you to open up your diary and look at what is happening.
In a nutshell, all you need to do is:
1) Write things down as soon as you’re told about them; and
2) Look at your diary every day.
What should you capture in your diary?
Write down anything that you need to remember (but probably won’t remember). For example, special events, things you need to bring to school/class, reading you need to do, and assignment due dates.
If all you do is follow the two tricks (write things down immediately and look at your diary every day), you’ll be extracting 95% of the value that comes from using a diary. In other words, you’ll feel more in control and less stressed.
But here are a few other things you can do to enhance your overall diary experience . . .

You can color-code your diary to make it more visually appealing and easier to read and organise.
Use different coloured textas to highlight different activities and events. I draw a blue box around school presentations, an orange box around community events, a light blue box around leisure/break activities, etc.

Sometimes when I’ve completed a task, I’ll add a sticker or a stamp to the page next to the task. This makes using my diary a little bit more playful and fun (rather than it feeling like a chore). It’s a nice way of taking a moment to celebrate completing a task before I move onto the next thing I need to do.

To avoid any nasty surprises, it helps to write down time reminders for important projects/tests/events, such as “Maths test in 7 days” or “Italian exam in 2 weeks”.
These reminders can help to combat procrastination and propel you into action. They make me realise “If I want to avoid a last minute scramble, I better get started today!”
A diary planner is the simplest system I’ve come across to help me manage everything I need to do in one place. But if you discover a better system that helps you to remember everything you need to do, run with that. Do what works for you.
The most important thing is you have a system that helps you to manage all your commitments. And preferably one that doesn’t involve writing all over your arms and legs.