Take a tour of my home and you’ll see whiteboards in my office, dining room, bedroom and kitchen.
These whiteboards, covered in scribbled text and bad drawings, make my house look a little quirky. But upon closer inspection, you’ll see that these whiteboards help me to work my way through the chaos and confusion of life.
Here are a few ideas on how you can use a whiteboard to make life a little easier for yourself:
If you’re a perfectionist like myself, a large whiteboard is a great tool to decrease anxiety and overwhelm surrounding big projects.
Afraid of making a mistake? Stress less!
With one swipe of a cloth, you can wipe away any ideas you don’t like. So don’t hold back. Make a mess. Make a start.
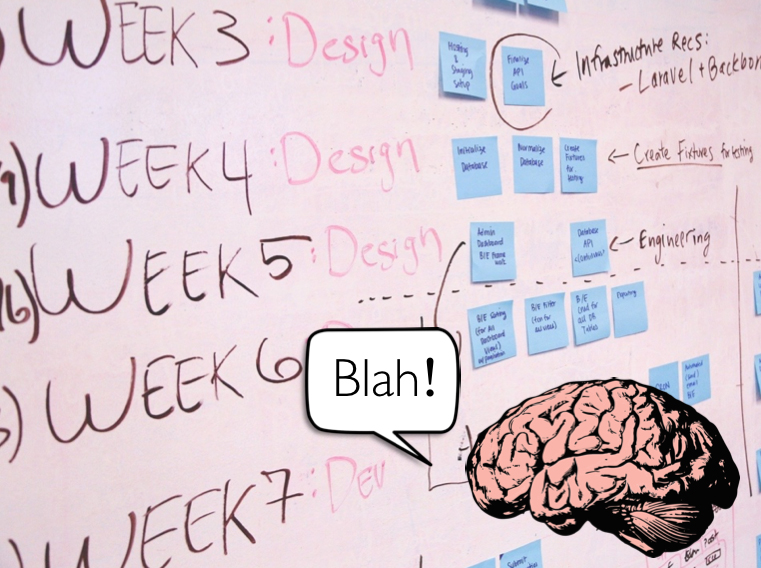
Have a lot going on in your life? I know this feeling all too well.
Most of us go through the day with lots of random thoughts swirling inside our heads. Unless we capture these thoughts, they can take up precious mental space and deplete our brainpower.
When I’m feeling overwhelmed, in order to reset and feel more in control, I stand up, head over to the closest whiteboard and I spend a few minutes scribbling out all the things that are on my mind. These things usually include:
• People to call and/or email
• Deadlines for projects
• Conversations to have with people
• Ideas for future projects
• Little irritants (things that are bugging me)
• Things I need to buy (usually food)
There’s something really powerful about getting your thoughts out of your head and onto a whiteboard. Try it and see how you feel after a brain dump session.
How can a whiteboard help you ace your exams?
Two words: active recall.
According to cognitive psychology, active recall (also known as retrieval practice) is the number one way to retain information. Research shows it’s a much more effective way to study than rereading your books or highlighting your notes.
Here’s how you can do a quick active recall session with a whiteboard:
1. Grab your whiteboard markers and a copy of your syllabus.
2. Flip straight to the unit content section.
3. Now choose a syllabus point.
4. Set a timer for 5 minutes.
5. Without looking at your notes or books, write and/or draw as much as you can remember on that syllabus point.
6. When the timer goes off, check to see how much you recalled correctly and where the gaps in your knowledge are.
7. Got something wrong or missed an important bit of information? Grab a different coloured pen and write that stuff down.
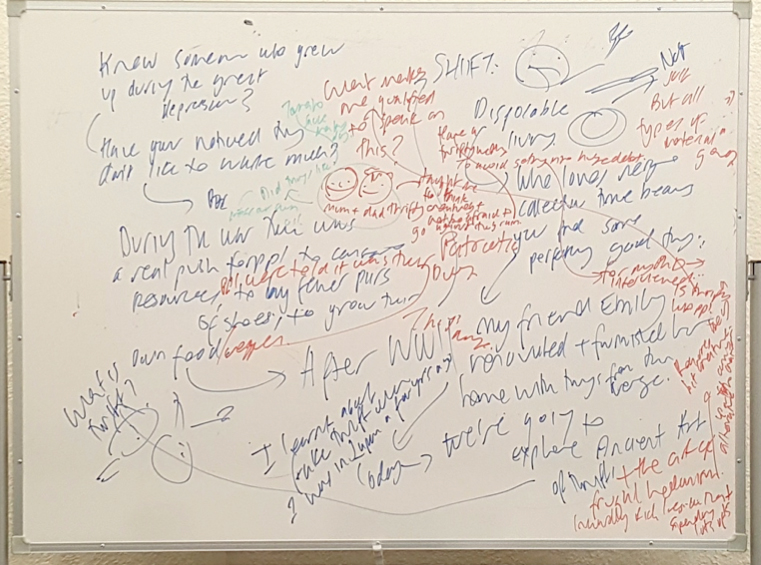
If you need to learn a presentation in a short period of time, I highly recommend doing active recall on a whiteboard.
This is how I learn all my presentations in a short period of time. I set a timer for 25 minutes and do an active recall session (I can’t stop until the timer goes off).
These sessions don’t look pretty (see example above) but it doesn’t matter. What matters is the process of seeing how the content flows, bringing the information to mind and identifying the gaps in my knowledge.
Need to start working on a big project? Find yourself procrastinating? Use a whiteboard to break down that big scary projects into bite size chunks. Set a timer for 3-5 minutes and map out all the tasks that you need to do.
When the timer goes off, pick a different coloured pen and write down the first small action you can take to make a start.
If this task is still too scary for your brain, break it down again (write down an even smaller starter step). Continue breaking the task down until the task is so small that it’s not scary or overwhelming for your brain.
Create a simple to-do list on your whiteboard. After you complete each task, look at your whiteboard and strike a line through it, give it a tick or wipe it out (sometimes for a bit of fun I do all three). Then pick another item and get to work.
The aim is to get through as many items on your list as possible.
If you’re feeling stuck, you can use a whiteboard to work through the problem by deploying a simple strategy. Here’s what you do:
1. Grab two different coloured whiteboard markers.
2. Grab one marker and put yourself in the shoes of a kind friend. Imagining that you are this kind friend, write down a question to yourself. It could be something along the lines of, “What’s going on?” or “Why are you feeling stuck?”
3. With the other coloured pen, write your answer (this time as you, not as your kind friend).
4. Continue asking yourself questions and answering them (alternating between your different coloured pens). Keep doing this until you get some insights and clarity about what’s going on.
If you’re trying to establish a new habit, write the behaviour down on the whiteboard (e.g. “Do two push ups after I finish each study session”). Every time you do the behaviour give yourself a tick on the whiteboard. It’s motivating for your brain to see the ticks add up. This in turn makes you want to engage in the behaviour even more. Before you know it, you’ll be doing the behaviour without even thinking.
Now you might be wondering . . .
Of course you can use a big sheet of butcher’s paper to help you learn, plan and brainstorm.
But for me, big sheets of paper can be intimidating. Like a brand new notebook, who wants to mess it up? Not me!
But with whiteboards, you can breathe a sigh of relief. Because it really doesn’t matter if you make a mess. At the end of the day, you can take a photo of the whiteboard and wipe that mess away.
Whiteboards also allow for more movement in your day. Since you need to stand up and move around to use a whiteboard, you’re spending less time in a chair.
Research shows sitting for long periods of time is bad for your health. So the more time you can spend working on your feet, the better!
When it comes to whiteboards, bigger is generally better (up to a point). You need room to move and make a mess. You don’t want to cramp your style.
But if the whiteboard is too big, it’s going to be kind of clunky. It will take up a lot of space.
I recently purchased a large whiteboard that can attach to my wall. This is my favourite whiteboard as it’s the biggest and it doesn’t get in the way.
There’s no need to rush out and buy a stack of whiteboards.
I acquired most of my whiteboards slowly over time for free. Some were collected from university dumpsters, roadside verges, Gumtree and friends who relocated overseas.

But here’s a tip . . .
When I need a change of scenery, I head to my local library and use the whiteboard that’s located in the private study room.
Keep a look out for whiteboards in your school, university or local library. I guarantee, you’ll start to see them everywhere. Don’t be afraid to use them (whiteboards are there to be used).
If you come prepared with your own set of whiteboard markers and a cloth eraser, you can get a quick whiteboard session in. At the end of the session, take a step back and look at what you’ve managed to accomplish. Notice if your whiteboard sessions leaves you feeling slightly better than before (I usually feel calmer and more in control).
Then take a quick snap with your phone so you can capture your ideas . . . before wiping all that mess away.
Share This:
You need to practice. And practice in a particular way.
If you’re preparing for a driving test, you can’t just study the Drive Safe Handbook (i.e., the theory and road rules).
You need to get behind the wheel of a car and drive.
Yes, it can feel uncomfortable and scary to begin with. But you’ll only improve your driving skills by pushing through the discomfort, placing your hands on the wheel and your foot on the accelerator.
If a person spent all their time only studying the road rules and never getting behind the wheel of a car, how would they go in the driving test?
It would be disastrous!
Yet, many students are approaching exams in a similar way.
These students are doing the equivalent of only studying the road rules handbook before the exam.
Here’s how they prepare for academic exams:
• By creating beautiful sets of notes
• By rereading their books and notes
• By highlighting their books and notes
• By rewriting their notes
• By summarising their notes
These are not effective ways to prepare for an exam.
Do these ways of revising feel nice and easy?
Yes. They certainly do.
But are they effective ways to remember information?
No.
Think about it like this . . .
What do you need to do in most academic tests and exams?
You have to read questions and pull the information out of your brain. Most of the time, you can’t look at your notes and books.
It’s just you and your brain.
You’re not being assessed on your ability to summarise information, your ability to reread your notes, or highlight information. So, why would you prepare for an exam in that way?
The best way to prepare for an exam is by practising remembering information. This is how you become masterful at answering questions with accuracy, speed, and confidence.
You don’t get that speed, confidence, and deep understanding by rereading your books and notes.
If you reread as an exam revision strategy, the only confidence you develop is fool’s confidence. You delude yourself into thinking you know it (“I’m ready!”). After reading your notes a few times, the ideas feel familiar to you (“I know this stuff”).
But trust me, you’ll struggle to retrieve the information in the exam.
Imagine yourself driving through red lights and failing to take the handbrake off before you leave the parking lot: that’s you . . . and it’s a fail.
I know this may sound harsh. But I’m speaking from personal experience.
In high school, it felt good to highlight my notes and reread them leading up to an exam. However, when it came crunch time, I was stressed out in the exam because I couldn’t retrieve the information. I felt embarrassed and confused by my results.
“But I studied so hard!” I’d cry. Why didn’t all those of hours of reading translate to better grades?
I wish someone had gently explained to me, “Yes, you did study hard. But you didn’t study effectively”.
Fast forward 20 years and I’ve learnt how to study smarter (not harder).
“The best way to prepare for any test or exam is to use a learning technique called active recall.
Active recall involves testing yourself.
You push your notes and books to the side and try to bring to mind as much as you can about a topic you’ve already covered in class. For example, you can use a piece of paper to write or draw out what you can remember on the topic. Once you’ve exhausted your memory, you check your books and notes to see how you went.
Yes, this is challenging. But it delivers results.”
I use this technique to learn content for all my school presentations.
When I speak to a group of students, parents, or teachers, it may look like I’m casually explaining strategies, but all my presentations are carefully planned and practised.
If I didn’t do this critical prep work, I would end up rambling.
This is why two weeks ago, I started doing active recall to learn a new presentation —or at least, I thought I was doing active recall.
I pulled out a copy of my presentation slides that had my notes scribbled all over them.
Within the first five minutes, I had to stop and be honest with myself: I wasn’t doing active recall. I was reading my notes.
Many of us can fall into the trap of rereading when doing active recall.
As the Learning Scientists state in their book Ace That Test:
“When you try to bring information to mind from memory, it often feels really difficult. It can be really tempting to quit or try to look up all of the information in your notes or your textbook, but slipping into re-reading your notes or textbook will reduce learning. Instead, it is better to try to bring as much information to mind from your memory as you can, and only after you have tried this should you look in your notes, textbook, or other course materials to see what you got right and what you forgot or need to work on more.”
Reading your notes/books over and over again feels nice and easy. It doesn’t require a lot of strain and mental effort.
In contrast, active recall can make us feel clumsy and awkward, especially in the early stages of learning something new.
So, I asked myself the question:
How can I stop myself from rereading when I do active recall?
I brainstormed ideas and devised a plan. Then, I broke down the process and practised running through it several times. To my delight, it worked!
Whether you’re trying to learn a new presentation or preparing for an academic test or exam, here is a process you can follow to avoid the trap of rereading.
Clear away your notes, books, and any other distractions. Let’s face it: if your notes and phone are in front of you, it’s like having a packet of crisps or a bowl of lollies within arms’ reach. It’s too tempting.
Your notes are important (you need them for step 4), but for now, take them and place them away from your body in another room.
Active recall requires 100% of your brainpower. If your attention shifts from your study to your phone, the effectiveness of your active recall sessions decreases. This is why I highly recommend you put your phone away from your body in another room before you sit down to do active recall.
Once you’ve cleared away distractions, take out your practice exam paper or list of questions (in my case, a printout of my presentation slides) and get a pen, a timer, and some sticky notes.
Your goal for the next 10 minutes is to recall as much as possible. Exhaust your memory.
I scribble all over my slides (yes, it’s a messy process). If I run out of space on the page, I grab a sticky note, write the additional information on it, and then stick it down on the relevant slide.
During these 10 minutes, expect to experience some discomfort. In fact, welcome and celebrate the discomfort!
The discomfort is a sign that you are on the right track and deep learning is happening.
Active recall can be mentally exhausting. After doing 10 minutes, reward yourself by taking a quick break. I usually get up and move my body. Sometimes, I make myself a warm drink or smoothie.
Before returning to your workstation, grab your notes or the answer sheet from the other room.
It’s not enough to pull the information out of your brain. You have to see how you did (what you got right and wrong and where the gaps in your knowledge are).
So, how did you go?
At this point, enter teacher mode. Pretend to be a teacher giving yourself feedback.
I pull out my red gel pen, fun stamp and sticker collection, and highlighters.
Now is when it’s okay to look at your books and notes. Pull them out and begin marking up what you got right, wrong and anything important you missed.
In my case, if any presentation content is a bit rusty, I’ll highlight that section. The highlighter signals to my brain that this section needs extra practice.
It’s important to celebrate any content you recall correctly. Give yourself a tick, a fun stamp or sticker or draw a smiley face to congratulate yourself.
This is a process. It usually takes a few practice sessions to successfully retrieve the correct information. Encouraging yourself makes the process fun and gives you a feeling of success (“I’m making progress!”).
Once you finish step 4, make a note for your future self: what question or section will you work on for your next active recall session?
This reduces decision fatigue. When you next sit down to study this subject, there’s no need to waste precious mental energy thinking, “What should I revise next?” Your brain knows exactly what it needs to do, and you can begin doing active recall straightaway.
After you’ve decided on your starting point, prepare your workstation for your next active recall session (e.g., put your notes out of sight).
These six steps work for me. But feel free to modify this process so it works for you. For example, it can help to do active recall with others (e.g., in a study group with friends testing each other). When everyone experiences the discomfort together, the process becomes less painful and more enjoyable.
Active recall works, but paradoxically, it feels like it’s not working. Often, when I do active recall nothing comes to mind. That’s normal! Don’t use this as an excuse to abandon this highly effective strategy and return to rereading, which is an ineffective strategy.
My advice is to trust the process. You need to persevere with this strategy for long enough to see with your own eyes that it works. Don’t expect instant results. This process takes time, but the results are well worth it.
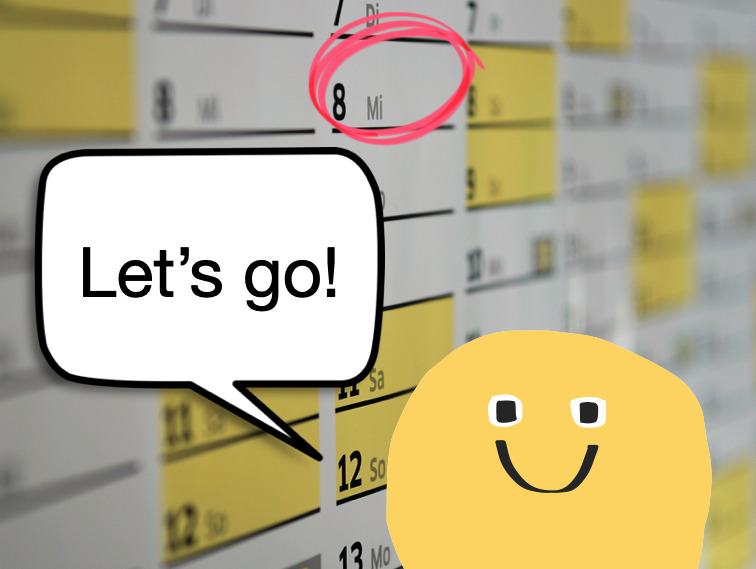
But how much time do you actually have?
It’s hard to get a sense just by thinking “My exam is in three weeks.” After all, three weeks sounds like plenty of time, right?
Don’t be fooled. This is your brain playing tricks on you.
No one ever has a full three weeks (504 hours) to prepare for an exam. Thrown into the mix is time for sleep, getting ready for school or work, working on assignments, socialising with friends and family, etc. Plus, you usually have more than one exam to study for.
But we can forget this. And when we do, we end up procrastinating with our work and it piles up for our future selves to deal with.
What’s missing is that your brain needs clear visual feedback. It needs to have a sense of the big picture (i.e., all your commitments laid out in front of it).
By using a year-at-a-glance calendar.
Earlier this year, I printed out a massive year-at-a-glance calendar (A0 size).
I scheduled all my upcoming presentations, holidays, important events (e.g., birthdays), deadlines, etc., onto the calendar and placed it in a prime position where I couldn’t miss it.
This calendar has made all the difference. It grounds me in reality, helps me feel more in control of my schedule, and gives me clear visual feedback. It also makes me think twice before I agree to take on a new project.
In the past, whenever I’ve said yes to a new opportunity, I haven’t always been grounded in reality. Too many times, I’ve been unintentionally cruel to future Jane.
Let me explain . . .
Back in 2016, I was on the home stretch with my PhD. The path forward was clear. After years of struggling with my PhD, the end was in sight. I was on track to hand in my thesis in a few months’ time.

But then something happened that threw me off course (well, erm, I threw myself off course).
I was asked by a company to run a series of workshops. Without even thinking, I said “Yes! I’d love to!”. It seemed like a great opportunity. One that was too good to pass up.
When I shared the news with my PhD supervisor, she seemed to think differently. Her face said it all: a mixture of concern and confusion.
“Why did you say yes to this? Do you need the money? What about your PhD? You’re so close to finishing”, she said.
The truth was I didn’t need the money. I said yes because without having my other commitments staring me in the face, I had all the time in the world. I was engaging in magical (delusional) thinking. I fantasised about having superhuman capabilities and being able to do it all.
I was wrong. There were only so many hours in the day, and something had to give.
To cut a long story short, pretty quickly the magical thinking wore off, and I regretted taking on the job. I had burdened my future self with a ridiculous amount of work and unnecessary stress.

But worst of all, I had delayed handing in my thesis by several months. A few months might not sound like much in the big scheme of things. But when you’ve been plugging away at a PhD for seven years, every month becomes precious. I risked losing momentum.
If I could teleport back in time and place a year-at-a-glance calendar in my office space, I like to think that I would have prioritised my PhD over the shiny new opportunity.
I recently finished reading an excellent book called ‘The Extended Mind: The Power of Thinking Outside the Brain’ by Annie Murphy-Paul.
In this book, Annie explores nine principles for expanding our intelligence (note: these principles are not taught in schools). She argues that instead of pushing our brains to work harder and harder, we can use our bodies, relationships, and surrounding environment to boost our cognitive abilities.

In the chapter called “Thinking with the Space of Ideas”, she writes:
“Whenever possible, we should offload information, externalize it, move it out of our heads and into the world. It relieves us of the burden of keeping a host of details “in the mind,” thereby freeing up mental resources for more demanding tasks like problem solving and idea generation.”
After reading this book, I understood why a year-at-a-glance calendar can be such a powerful tool. Seeing all your projects and commitments in one glance allows you to think smarter and more strategically.
These calendars also help to orient you in time. You can see how much time you have between now and doing the things you need to do.
Your projects and deadlines stare back at you every day. There’s no escaping them.
Seeing your life in this way also helps you to plan and pinpoint busy periods.
Here’s an example . . .
This month, I have more presentations scheduled than usual. This means I need to manage my energy levels, prioritise sleep, and eat healthily.
But a quick glance at my calendar tells me I have a few ‘free’ days before all these talks begin. I can use this time to cook a few meals to pop in the fridge and freezer to make life a little easier during this busier period.
One of the worst things I can do when I get busy is order takeaway food and sacrifice sleep to work. I refuse to do it as it always backfires. If I’m functioning at half capacity, my talks and work will suffer.
These calendars can also provide useful information to help you manage your energy levels, reduce ridiculous workloads, and avoid burnout.
Earlier this year, there was a week when I delivered more talks than usual. During this week, I found myself taking 15-minute power naps between talks to recharge before the next one. Even with all these power naps, by the end of the week, I felt tired. I drew a tired little emoji face on my calendar to represent this.
That tired emoji face is a constant reminder: you have mental and physical limits. Don’t overdo it.
It’s important to find a calendar that is both aesthetically pleasing and functional for you. This means you probably can’t just go to the shops and pick something off the shelf.
You could order a hard copy calendar online, but when the year is already well underway who wants to potentially wait weeks for their calendar to arrive in the mail?
You can purchase a digital download online and take it to your local print shop on a USB stick. Some templates display the month as a long list of days; whereas other calendars group the month into weeks, with each week on a separate line (see examples below).


Alternatively, you could buy a monthly calendar, cut it up, and stick it together.
One of my friends suggested I try doing this. I gave it a shot, but my calendar looked like a failed arts and crafts project (with messy bits of tape plastered everywhere). Plus, the boxes were too small and cramped my style.
After some trial and error, I purchased a digital download from Etsy for $20AUD and printed it A0 size for $10AUD. All up, my calendar cost me $30AUD – money that was well spent.
The bottom line is you have to figure out what works for you and how much you’re willing to spend.
• Write on the calendar when all your exams, appointments, special events, and major projects will take place.
• If you don’t yet know the specific dates of each exam, note the week they begin and assume the worst-case scenario (your exams will be sooner rather than later).
• Consider laminating your calendar so you can use whiteboard markers on it.
• If laminating is too expensive, use sticky notes and washi tape instead.
• You can mount your calendar on core-flute material or foam board to give it a sturdier structure.
• Resist the urge to put every detail on your calendar. Focus on the big project deadlines, appointments, exams, etc. The details for what and when you work on each project can go into your weekly planner and/or on your to-do list.
• If you have the wall space, consider printing your calendar A0 size (841mm x 1189mm). You want plenty of space to write in each box.
In our noisy world where we are bombarded with endless opportunities, many of us would benefit from embracing analog tools like the year-at-a-glance calendar. These calendars help to ground us in reality and focus our minds on what matters.
If you have a lot going on in your world and find yourself saying “Yes!” to every shiny new opportunity that comes your way, do yourself a favour and create a year-at-a-glance calendar. Having your commitments stare you in the face every day is a simple but powerful way to live with greater focus and intentionality.
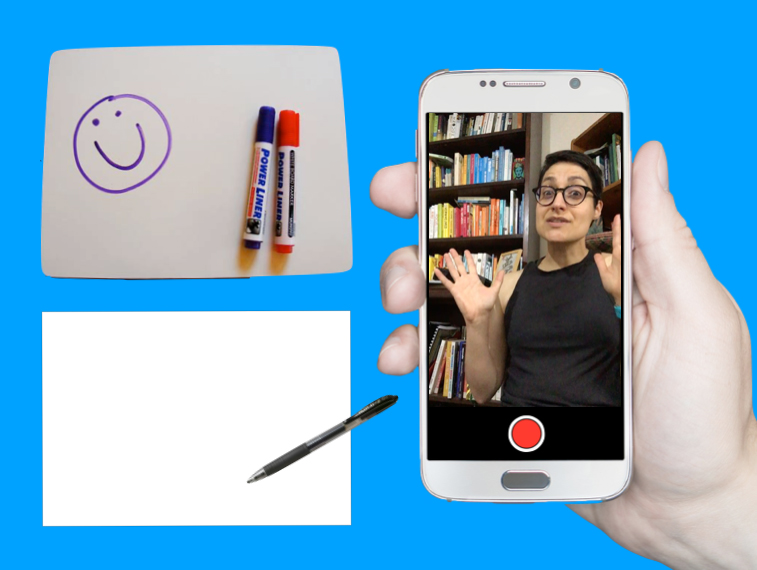
Research shows active recall (aka retrieval practice) is a highly effective strategy for remembering information. This strategy will take your studies and your grades to the next level.
Active recall involves bringing information to mind without looking at your books and notes.
I have spent the last 30 days experimenting with this excellent learning strategy. In this blog, I’ll share what I did and how I kept the process interesting for my brain.
I no longer need to study for tests and exams.
So, why did I spend 30 days using active recall strategies?
In my line of work, I need to constantly come up with new and original content to present to students. I also need to memorise this content. Why?
Because if I was to read from a sheet of notes or text heavy slides that would be really boring for students. I want to connect with students and to do this, I have to be able to deliver the content off the top of my head with speed and ease.
This is where active recall enters the picture.
Active recall helps to speed up the learning process. It allows you to learn more in less time.
Below I share some of the ways I use active recall to learn new presentation content. Keep in mind, you can use all of these strategies to prepare for an upcoming test or exam.
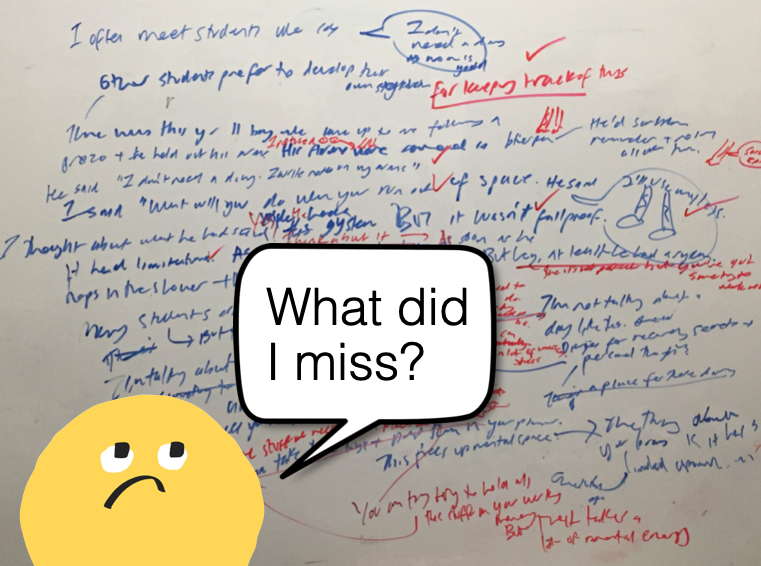
Whiteboards are wonderful learning tools. Here’s how I use a whiteboard to do active recall . . .
I push my speech notes to the side, so I can’t look at them. Then I grab a marker and say to myself, “What can you remember? Go!”.
I write out everything I can remember on the whiteboard. Once I’ve exhausted my memory, I pick up my notes and check to see how I went (using a red marker to make corrections).
No whiteboard? No problem!
I pick up a pen and sheet of paper and start scribbling out whatever I can remember on the topic. When I get stuck, I pause and take a few deep breaths as I try to scan my brain for the information.
I regularly remind myself that it is okay to not remember the content. “This is how the process goes!”, I say to myself. There is no point beating myself up. That only leads to feelings of misery and not wanting to do active recall practice.
After having a shot at it, I take out my notes, pick up a red pen, and begin the process of checking to see how I went.
Sick of writing? I get it.
Try drawing out the information instead. Alternatively, you can use a combination of words and pictures, which is what I often do.
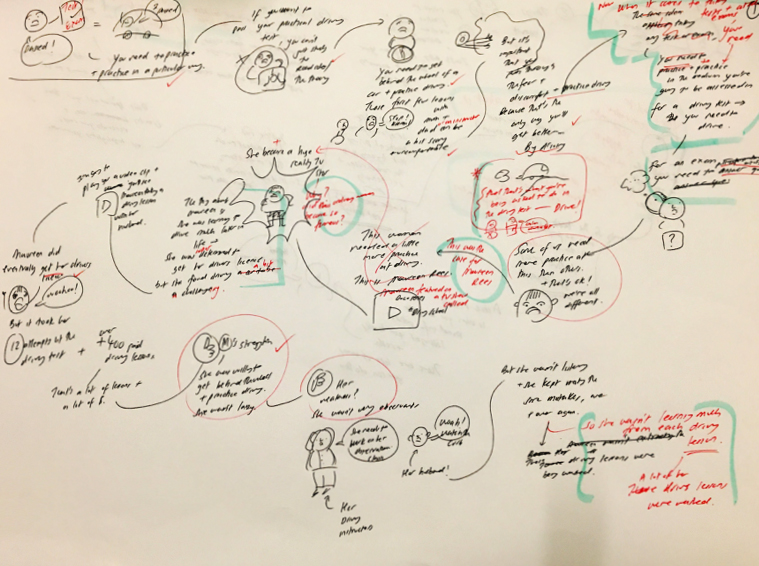
Grab a blank piece of paper (A3 size is best) and create a mind map of everything you can remember on a topic (no peeking at your notes). Then check your notes or the original mind map to see what you remembered correctly and incorrectly.
Writing and drawing out information can take time. If you want to speed up the process, you can talk to yourself.

But don’t do this in your head. It’s too easy to just say “Yeah, yeah, I know this stuff!”. You need to speak it out loud as this forces you to have a complete thought. Then, check your notes to see how you went.
The only downside with this approach is you don’t have a tangible record of what you recalled, which brings me to the next strategy . . .
I make videos of myself presenting the content (without referring to my notes). Although I use special software and tools to make my videos, you don’t need any fancy equipment. Your phone will do the job. Here’s what you can do . . .
Set your phone up so the camera is facing you. Now hit the record button and tell the camera what you’re going to do active recall on. Have a shot at explaining the idea. Then stop recording and hit the play button.

Watching yourself struggle to remember information is often hard viewing. But this is where it’s super important to double down on telling yourself kind thoughts (e.g., “I’m still learning this content. It’s going to be rusty and feel clunky – that’s okay!”).
You need to take a deep breath and keep watching because the video will give you valuable feedback.
For example, if you stop midsentence and you don’t know how to proceed, that tells you something: you don’t know this stuff so well! Make a note. This part of the content needs your attention.
Hand your notes over to a friend, parent, or sibling. Now get them to ask you questions on the content.
I sat with my mum and showed her a print out of my slides for a new presentation. The slides were just pictures (no text).
As I went through the slides, I explained the ideas to mum. I made notes of any sections I was rusty on. Mum also asked lots of questions, which allowed me to think more deeply about the content.
When it came crunch time (a few days before the final presentation), I printed out my presentation slides (16 per page) and used each slide as a prompt. I’d look at the slide and say, “What do I need to say here?”.
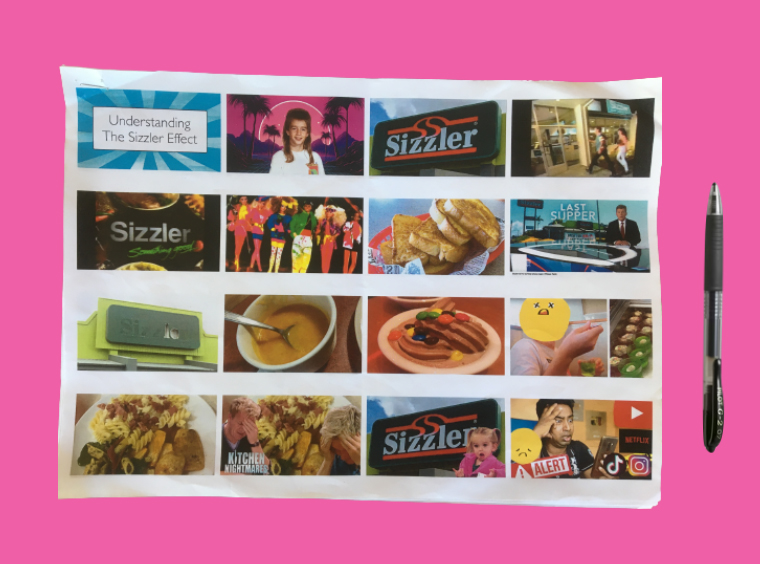
Sometimes I wrote out what I’d be saying in relation to each slide (without looking at my notes). Then I checked my original notes to make sure I hadn’t forgotten anything.
It’s really important that you don’t skip the stage of checking to see how you went, especially as you become more confident with the content.
At times, I found myself thinking “I know this stuff! I don’t need to check my notes” but then another part would say, “You better just check . . . just to be on the safe side”.
I’m glad I forced myself to check because more often than not I would discover that I had missed a crucial point.
Zines are cute little booklets you can create on any topic you like. They are fun to make, so I thought I’d try making a mini zine on the main points of some new content I had to learn.
I folded up an A4 page into a booklet and then I sketched out the main points on each panel.
I create a deck of flashcards on some key ideas (question on one side and the answer on the back) and then I test myself with them.
I read the question and before flipping the card, I write out the answer on a sheet of paper or say it out loud. Then I check to see how I went.
The beauty of flashcards is they are small and portable (they can easily fit in your pocket or bag). Whenever you have a spare minute or two, you can get a little active recall practice in.
It’s not enough to do active recall just once on the content you need to learn. For best results, you want to practice recalling the information several times over a period of time.
I didn’t follow a strict schedule for the 30 days. I had my notes for each important chunk of information I had to learn pinned to eight different clipboards.
Every morning, I’d pick up a different clipboard and I’d practice that specific content. I knew as long as I’d had a good night’s sleep in between practice sessions that the information was being strengthened in my brain.
Doing active recall is a bit like doing a high intensity workout: it can be exhausting. But you must remember, just like a high intensity exercise session is an effective way to train and get fit, active recall is an effective way to learn. Unlike less effective strategies (e.g., rereading and highlighting), you can learn a lot in a short space of time with active recall.
The key is to expect the process to be a little uncomfortable. Don’t fight the discomfort. If you trust the process and persevere, it won’t be long before you begin to see amazing results.
Just because active recall is challenging to do that doesn’t mean you can’t have fun with it.
Using a combination of different active recall strategies is one way to keep things fresh and interesting for your brain. But you may wish to try the following things to add a little boost of fun to your active recall sessions:
• Use a different type of pen
• Use a different coloured pen
• Change the type of paper or notebook you use (e.g., instead of using lined paper, use blank A3 paper)
• Incorporate movement into your active recall sessions (e.g., walk and test yourself with some flashcards)
• Change your study environment (e.g., go to the library or study outside)

Like I said, active recall is challenging to do, especially when you first start learning new content. You can feel awkward and clumsy. For this reason, it’s easy to make excuses to get out of doing it (e.g., “I’m too tired”, “I’m not ready to do it”, and “It’s not the right time”).
This is where you need to harness the power of habits.
Find a set time in your day to do a little active recall practice. For instance, during my 30 days of active recall, I scheduled my practice sessions for first thing in the morning. I knew after I washed my face, I would sit down to practice.
Incorporating active recall into my morning routine worked really well for me. I was getting the hardest thing done first thing in the day. And once it was done, I could relax. It was done and dusted!
At a certain point, I became more confident with the content and I found I was on a roll. I felt motivated to do active recall.
This is when I started to look for spare moments in the day to squeeze in a few extra mini practice sessions.
For example, one day I found myself waiting in a car. I grabbed a paper shopping bag and started scribbling out the content onto the bag. As soon as I got home, I checked the shopping bag against my notes.
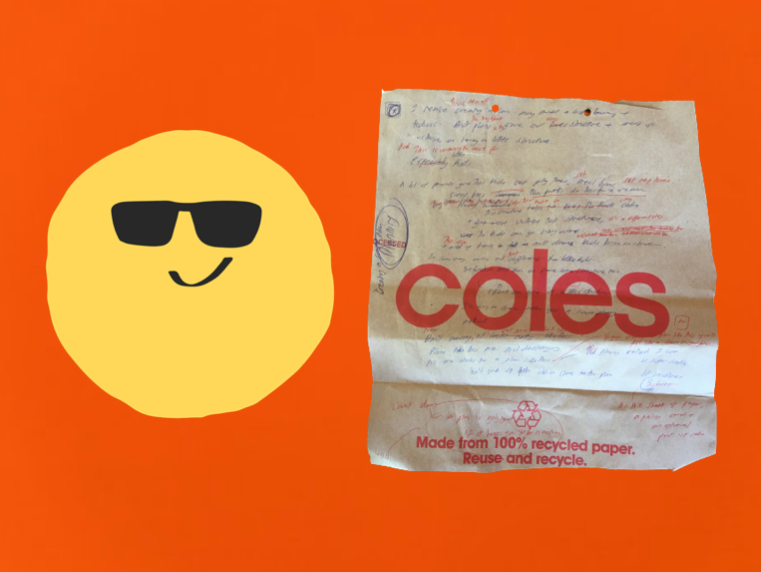
I hope you can see that there’s no one set way to do active recall. This is a highly effective strategy you can be creative with. As long as you’re testing yourself and checking to see how you went, you can’t go wrong.
And if you do make a mistake? It’s no big deal. If you check to see how you went, you won’t embed the error in your long-term memory.
Dr Jane Genovese delivers interactive and engaging study skills sessions for Australian secondary schools. She has worked with thousands of secondary students, parents, teachers and lifelong learners over the past 15 years.
Get FREE study and life strategies by signing up to Dr Jane’s newsletter:
© 2025 Learning Fundamentals